
Pseudo-color SEM Imagery of Pollen for Classification and Art
This work was done for a project implemented as a part of OPT 507- Practical Electron Microscopy and Scanning probe Microscopy for the Engineer, Scientist and Artist offered at the Institute of Optics, University of Rochester in Spring 2004.
Proposal (This is the propoal made at the beginning of the project)
Pollen grains provide a very interesting subject for SEM Imagery. They have beautiful and diverse surface structures which are unique to particular plant types. Their SEM Images provide an insight into the delicate designs in nature which are breathtaking and completely unlike any man-made objects. Also, their SEM images give an opportunity to indulge one's artistic instincts by providing beautiful textures to add color to.
Project Idea
This project will involve imaging pollen grains and their growth patterns from four of different plants and identifying the pollen with the particular plant. For each plant's pollen four SEM Images will be taken amounting to a total of 16 images. Once captured, the grayscale images obtained from the SEM will be converted to color images using Adobe Photoshop. These colors will not be natural colors, but simply an "artist's view".
Anticipated Microscopic Techniques
1. Secondary Electron Imaging
2. Back Scattered Electron Imaging
3. Light Microscopy
4. Coating
5. Critical Point Drying/HMDS
Anticipated Non-Microscopic Techniques
1. Image Editing using Adobe Photoshop
2. Association of pollen with particular plant types
Estimate of Sample Preparation Time
10-12 hours including finding the pollen grains in the middle of winter.
Estimate of Microscopic Analysis Time
12-15 hours
Estimate of Image Processing Time
25-30 hours
Sample PreparationThe pollen samples used are insulating and have very high moisture content. The tissue was fixed by soaking the samples in gulteraldehyde for 10 minutes. After that the samples were sequentially soaked in 10%, 25%, 50% and 100% ethanol in order to replace the moisture with 100% ethanol. This is helpful as the ethanol has less surface tension compared to water. Hence, it can be released from the structure without causing any damage. For the cactus, the samples in 100% ethanol were dried using Critical Point Drying (CPD) and fixed on a SEM stub. However, in this case it was observed that CPD didn't provide significant benefit over air drying. Hence, all the samples from other flowers were just air dried to remove the ethanol. All samples were then coated with gold. The gold was sputtered for 100-150 seconds at 10 mA. The gold acts as a thin conductive layer on top of the samples.
SEM Imaging
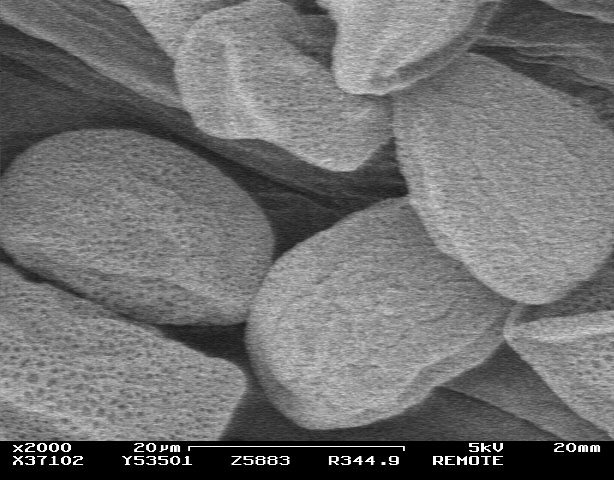
The working distance was kept between 5mm-15mm. The working distance was governed by the accelerating voltage and the charging effects. In general, an effort was made to keep the working distance long inorder to avoid charging. However, due to the low accelerating voltages, the electron beam could not be focussed at very long working distances. The accelerating voltage was maintained between 1-5kV in order to avoid charging the sample surface. Also, aperture was usually maintained at setting 1. Since, the pollen are usually large between 1-5 microns, the magnification needed was between 500-2000. The secondary electron detectors were used in the mixed mode of operation.
Adobe Photoshop was used for post-processing of the micrographs and to convert them to color. The tools used included converting the image from gray to RGB color, the magnetic lasso, fill layers, brightness/contrast adjustments and hue/saturation filters.
I would again like to inform the reader that all the micrographs shown below have been processed and do not represent the true data obtained from the SEM. The images have been modified for the sole purpose of art.
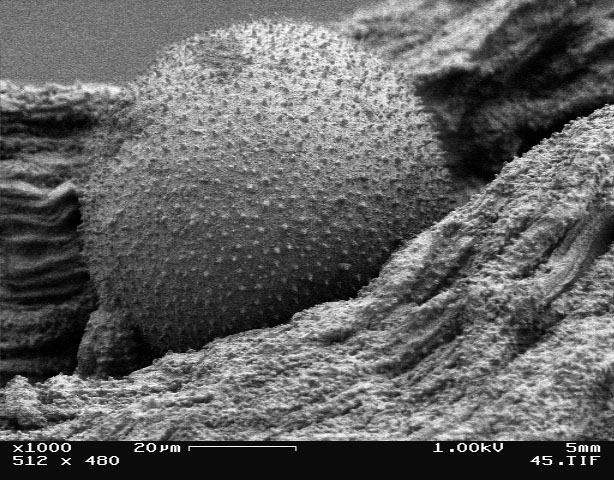
The images below show the steps in adding color to the images:
Figure 1. (left) SEM Micrograph (right) Contrast/brightness adjusted
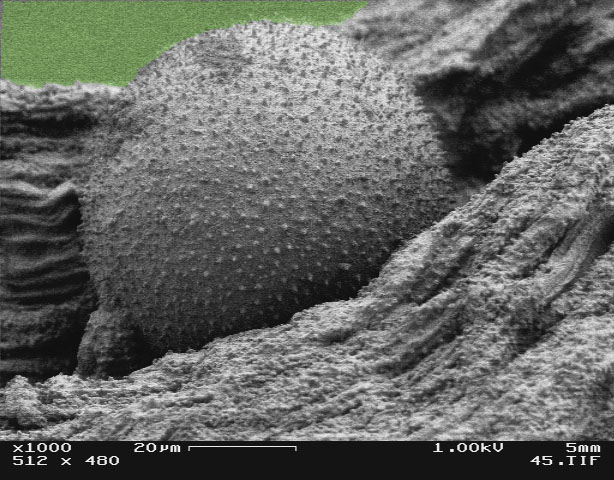

Figure 2. (left) Backgournd chosen using magnetic lasso and colored green (right) inverse of the background chosen and colored

Figure 3. Pollen grain chosen using magnetic lasso and colored yellow
The following images have been processed in the manner illustrated above.
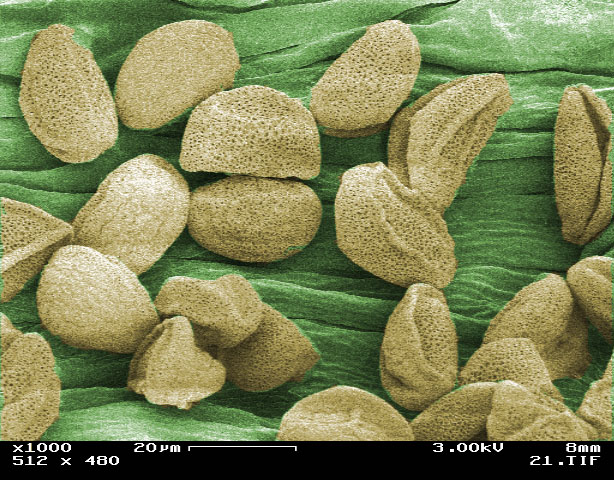
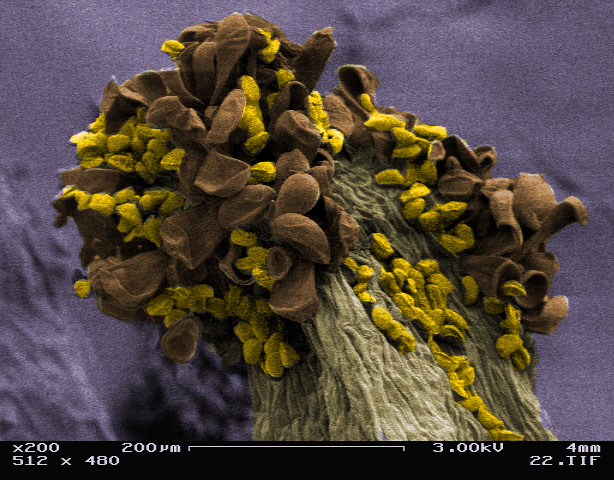
Figure 4. Images from a Daffodil
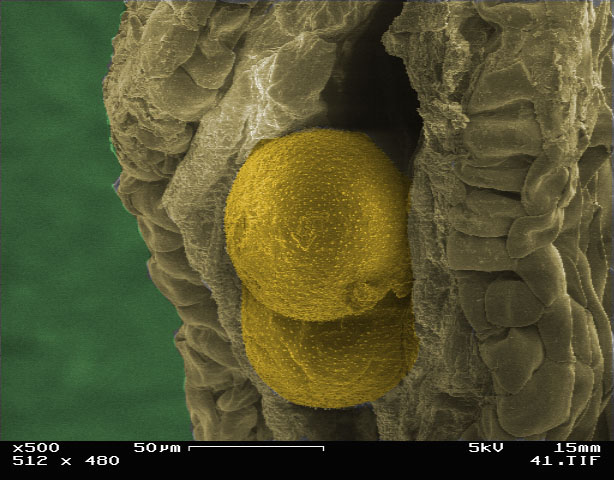
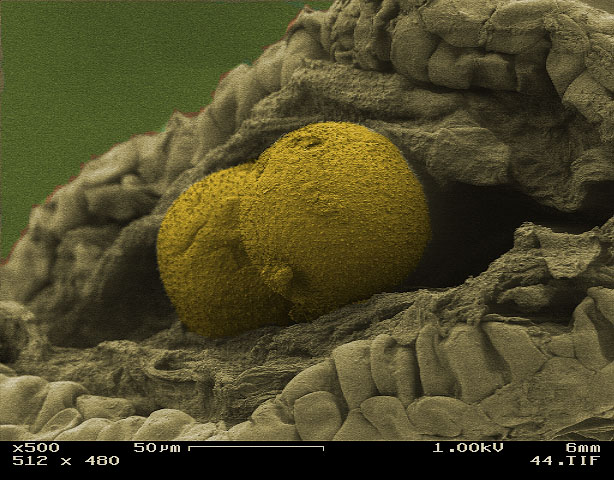
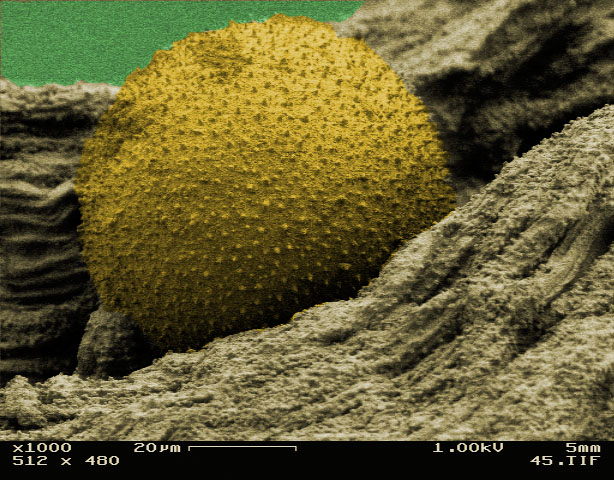
Figure 5. Images from an unknown purple flower
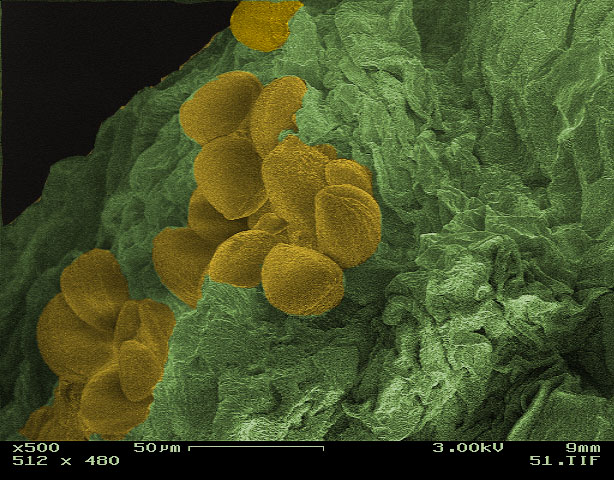
Figure 6. Images from a Crocus


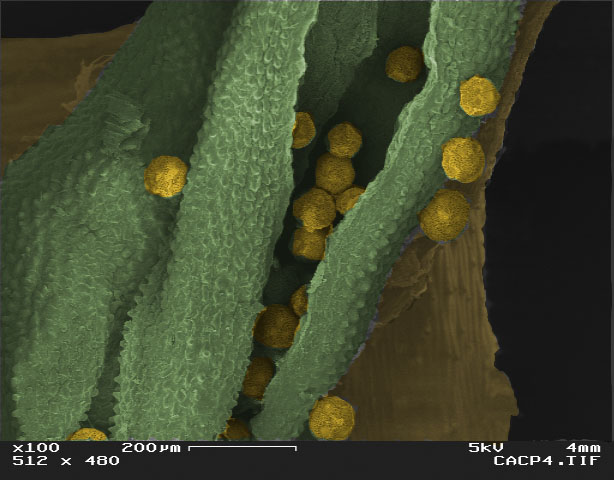
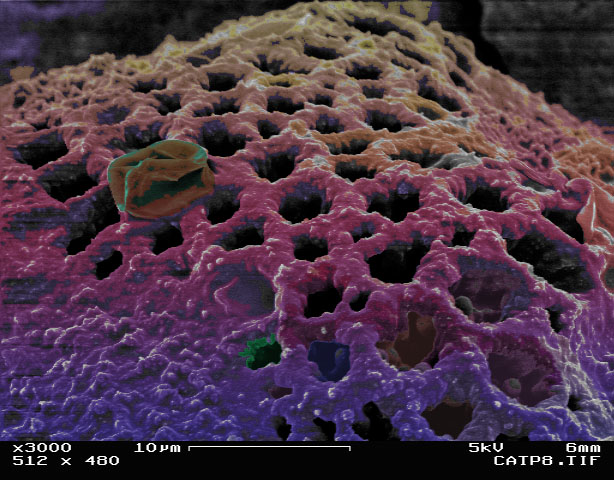
Figure 7. Images from a Cactus flower
Light Microscopy
Light microscopy was performed on the samples. However, it was observed that the light microscope lacked the depth of field needed to focus on the entire pollen. This justifies the use of SEM even at low magnifications. The images taken are shown below.
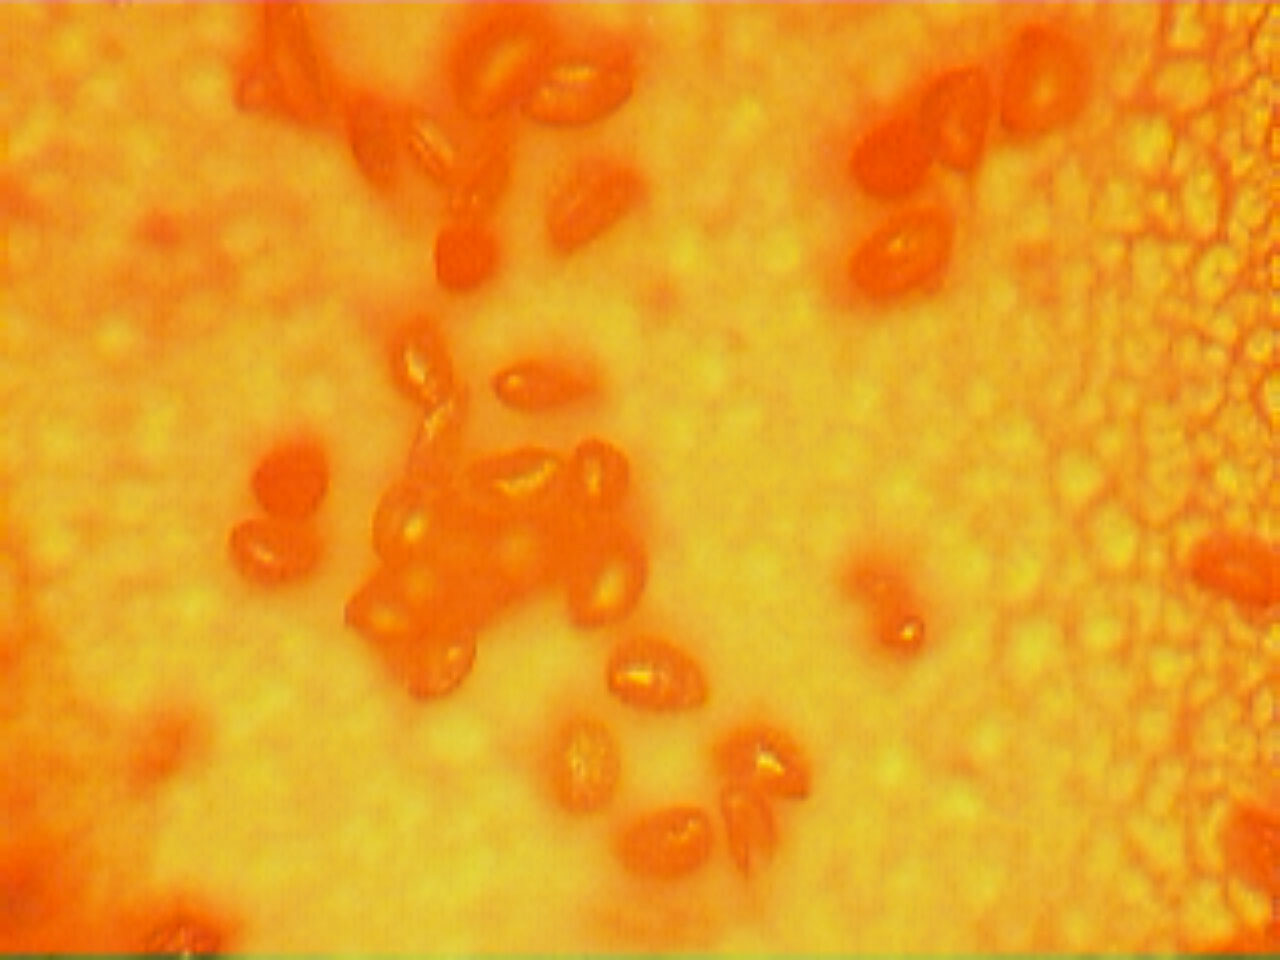
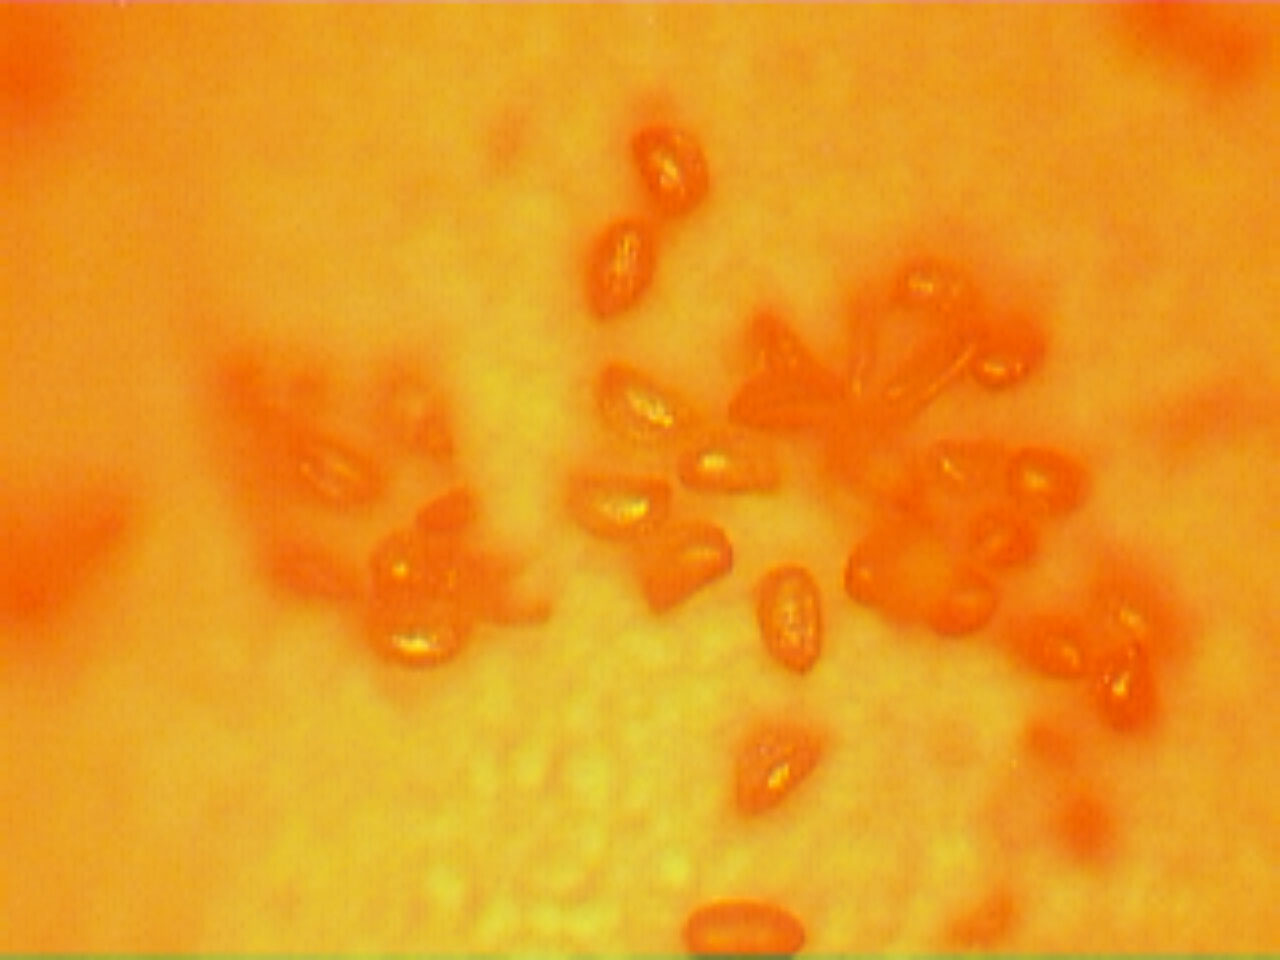

Figure 8. Light microscope images
Back Scattered Imaging
Back scattered imaging was performed on these samples. It was observed as expected that there was no significant variation in atomic number as these are organic samples coated uniformly with gold.
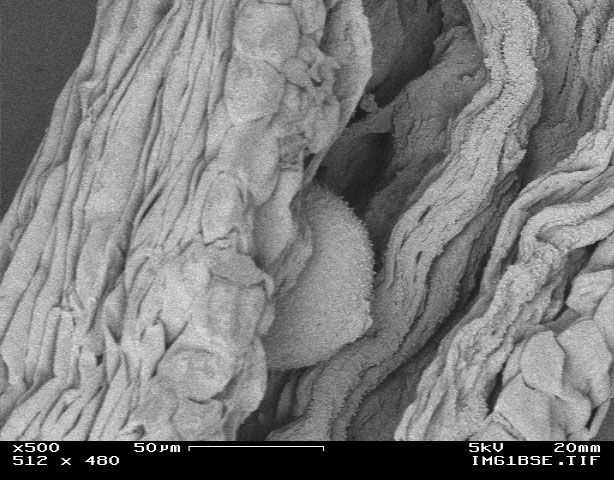
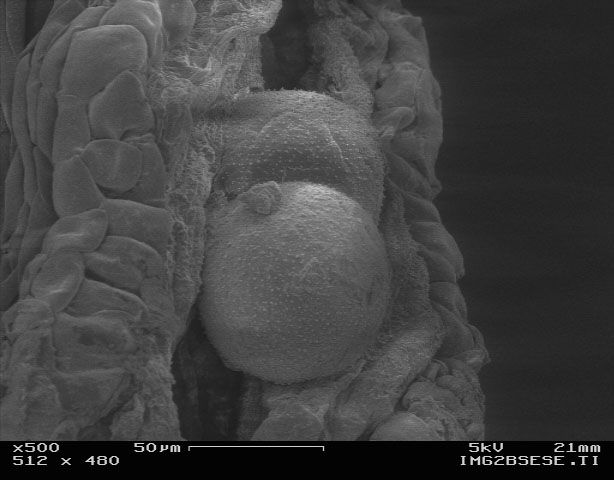
(Left) BSE detector + Contrast/Brightness adjustment (right) BSE and SE detectors in mixed mode + Contrast/Brightness adjustment
BSE/SE detectors in mixed mode with TV Integration + Contrast/Brightness adjustment
Figure 9. Back scattered images
X-ray Microanalysis
X-ray microanalysis was performed on these samples. As expected only three peaks show up, carbon and oxygen because of the organic samples and gold due to coating.
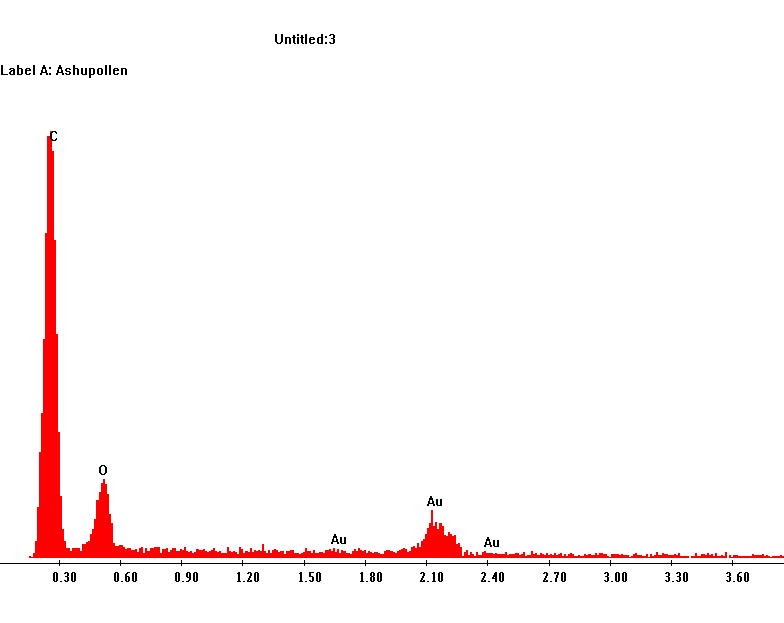
Figure 10. X-ray spectrum showing carbon, oxygen and gold peaks
Electron Flight Simulation
The electron paths inside the sample was calculated with a software that uses Monte-Carlo simulation. As we can see from the data, most of the electrons are generated very close to the surface.
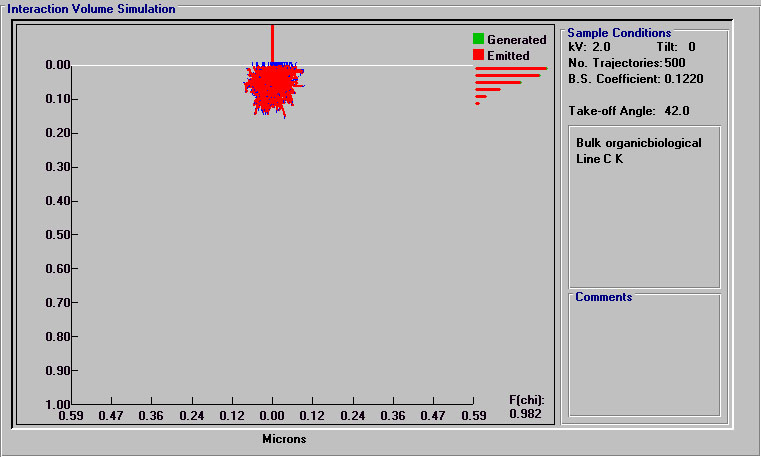
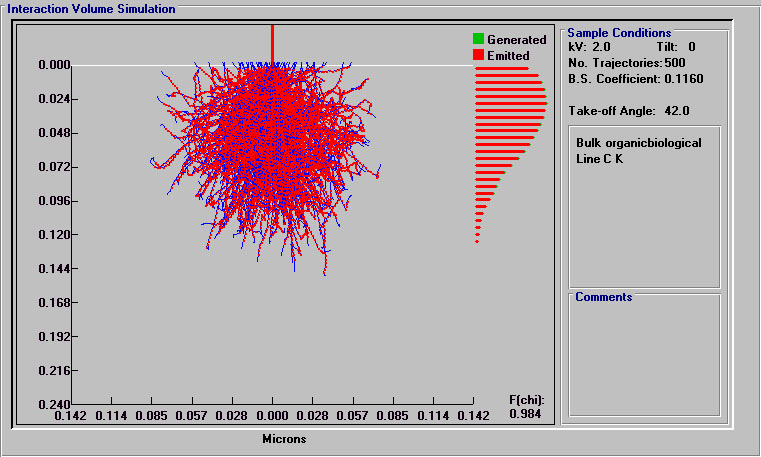
Figure 11. Electron flight simulation results
Conclusions
The samples provided a very interesting subject for imaging. Drying the samples caused problems as it was tough to retain the shape of the pollen grains. Charging also posed problems as the samples are insulating. However, coating and appropriate choice of working distance, accelerating voltage and aperture helped reduce that. A modest attempt was made at coloring the images.
This project would not have been possible without the immense help and support given by Brian McIntyre. I would like to thank him for having taught such a wonderful course.