Introduction
Samples and Preparation
Imaging and Results
-Chlamydomonas
reinhardtii cells
-Gold Microneedle
Array
-Pierced C. reinhardtii cells
Conclusions
Acknowledgments
References
Genetic transformation of plant cells, like algae, would allow us to
alter the organism’s genome to create more efficient biofuels or
components of pharmaceuticals. However, the transformation of plant
cells is challenging due to their cell wall, which makes it hard to
insert DNA without killing them. Dr. Muakibo’s lab is testing a new
method of transforming microalgae cells with an array of microneedles
loaded with genetic materials. The cells are impaled on the needles
using centrifugal force. The key feature of this approach is that we
can control the impact of the gene delivery by simply changing the
needle dimensions and/or centrifuge settings.
In order to confirm that the cells have in fact been pierced onto the
microneedles, scanning electron microscopy is utilized. The cells and
needles are too small to be seen with the naked eye thus high
magnification is required. The backscatter application in the SEM uses
the different atomic numbers of the cells and the needles to create a
stronger contrast between them. It displays a x-ray image of the
needle tip inside the cell
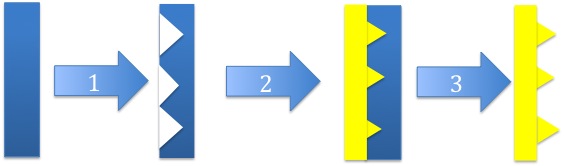

Figure 2. SEM Image of an Au Microneedle
Array; This image is taken at a 45 degree angle to show the
morphology of the needles
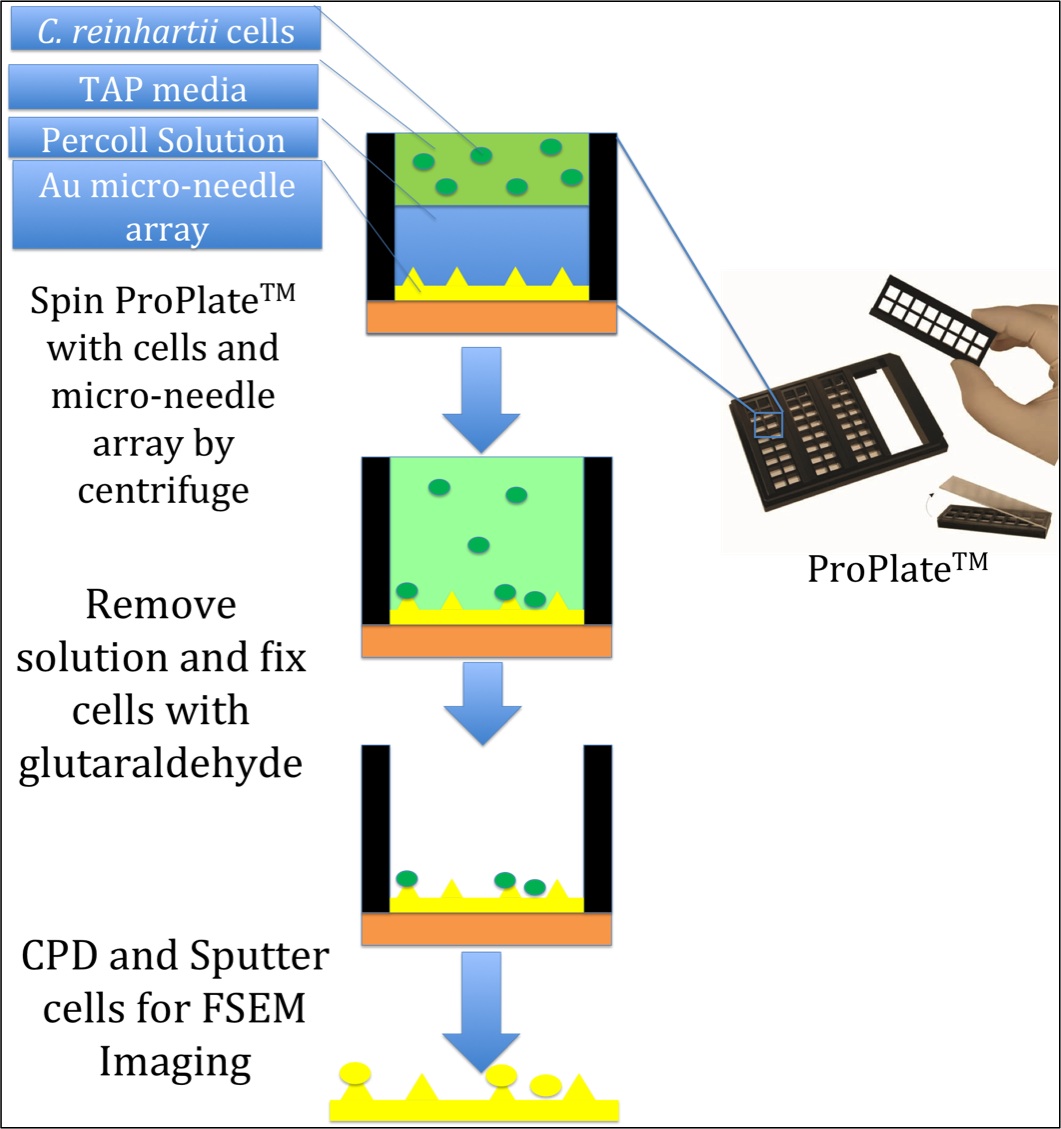
C. reinhardtii cells were grown in TAP media for three days
under a fluorescent lamp. In order to pierce these cells onto
the gold microneedles, a ProPlateTM is used for our
setup. The gold microneedles were clamped into the ProPlateTM
and sterilized. An aliquot containing 1E07 cells was
removed from the culture. These cells were pipetted into the
ProPlateTM well over a layer of Percoll solution.
The Percoll is used to control the speed and direction at
which the cells are accelerated onto the needles. This
prevents the cells from being splattered onto the gold
substrate.
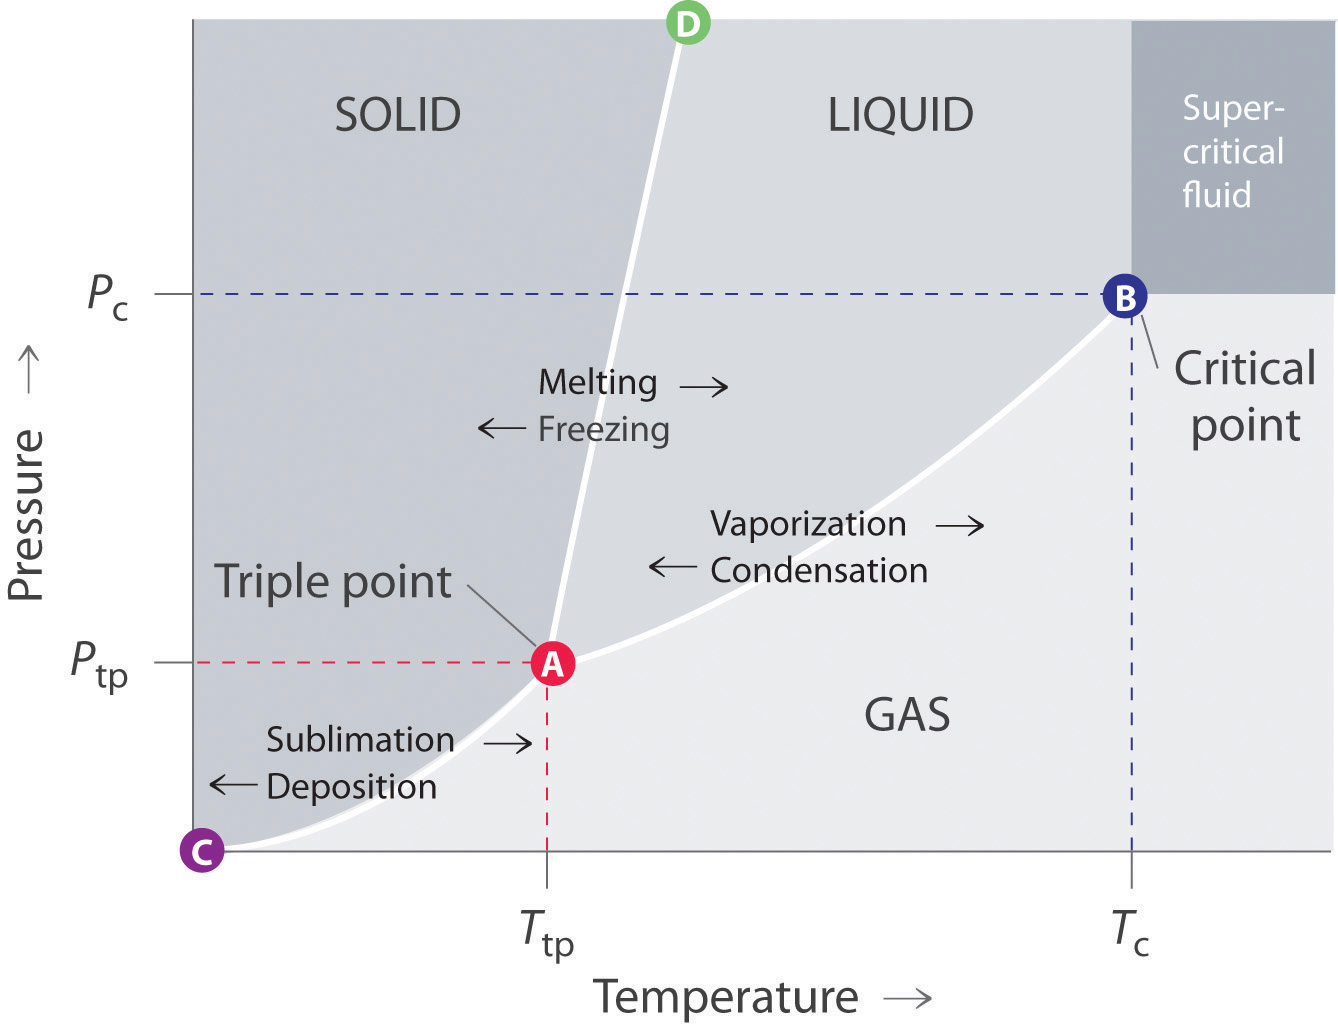
The ProPlateTM with the microneedles and cells is centrifuged to induce the piercing of the cells onto the needles. Immediately after the cells were pierced, they were fixed with glutaraldehyde and dehydrated with ethanol. The sample was then critical point dried to replace any water in the cells with carbon dioxide gas. Finally, the sample was sputtered with gold. These steps are outlined in the schematic below.
Gold sputtering was done to make the sample conductive and
create a ground. The ground is necessary to create a pathway
for the electrons from the beam to escape form the sample.
Without a ground, the electrons would accumulate on the sample
surface and cause blurring of the image. The sputtering also
increases the mechanical strength of the cells.
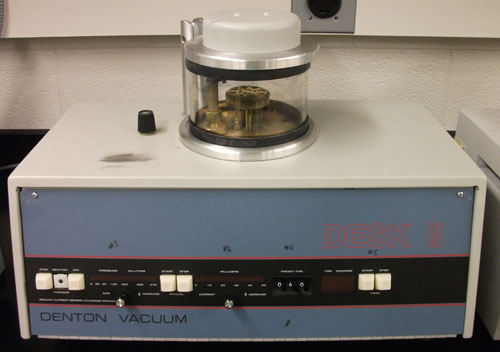
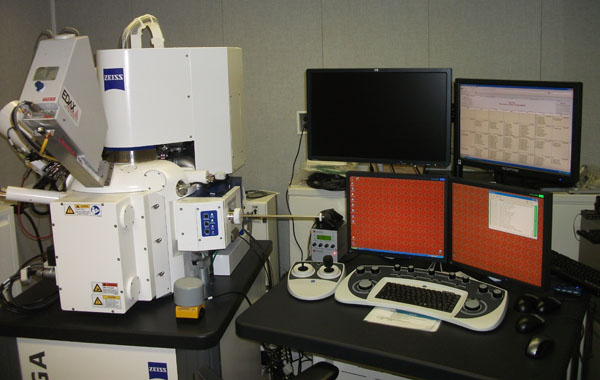
Figure 6. The Zeiss Auriga Crossbeam SEM System at
the University of Rochester used for imaging
C. reinhardtii is a strain of microalgae commonly used in laboratories for research purposes. Dr. Mukaibo's lab use the CC-124 and CC-125 strains. These are the male and female wild strains of C. reinhardtii. They both have tough cell walls and are mobile due to their flagellum.
The genetic modification of microalgae will assist in
the development of alternative energy. However the cell
wall of the microalgae prevents transfection using
traditional methods. Thus the idea of piercing the cells
with conical microneedles coated in DNA was pursued.
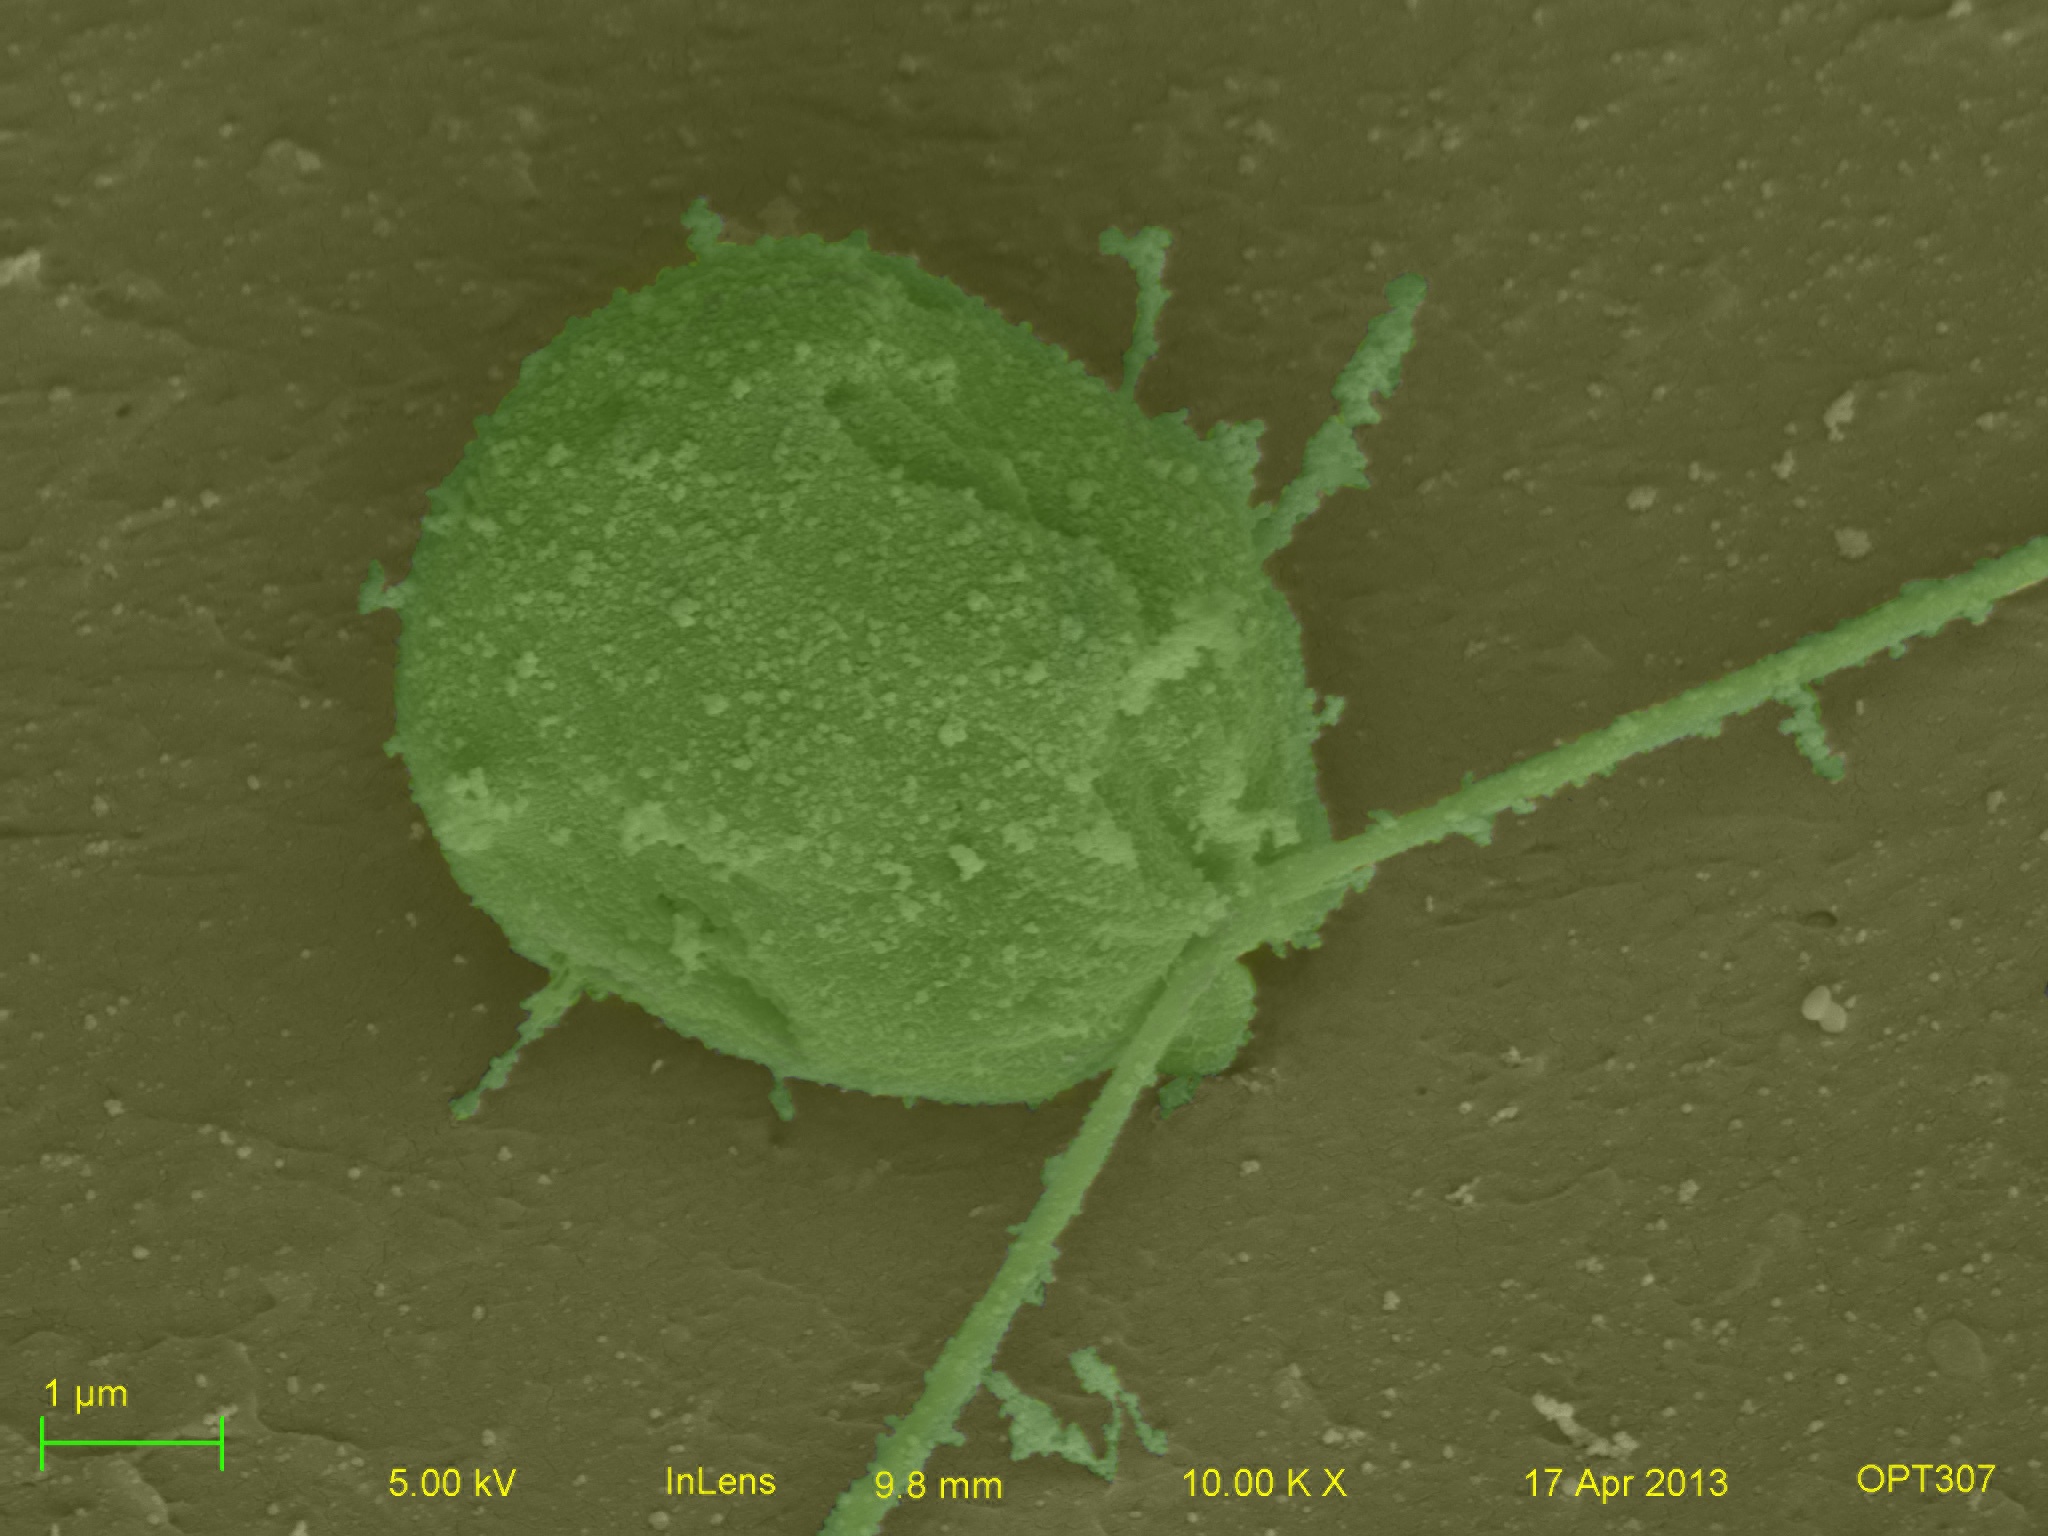

Figure 8. Colorized SEM Image of an Au Microneedle

The C. reinhardtii cells are
pierced onto the gold microneedles using
centrifugal force. When pierced, the cells
can receive the DNA on the surface of the
needles and become transfected. The SEM
images allow us to confirm that the cells
were in fact pierced. Below is a series of
images taken of the same pierced cell
using varied imaging settings.
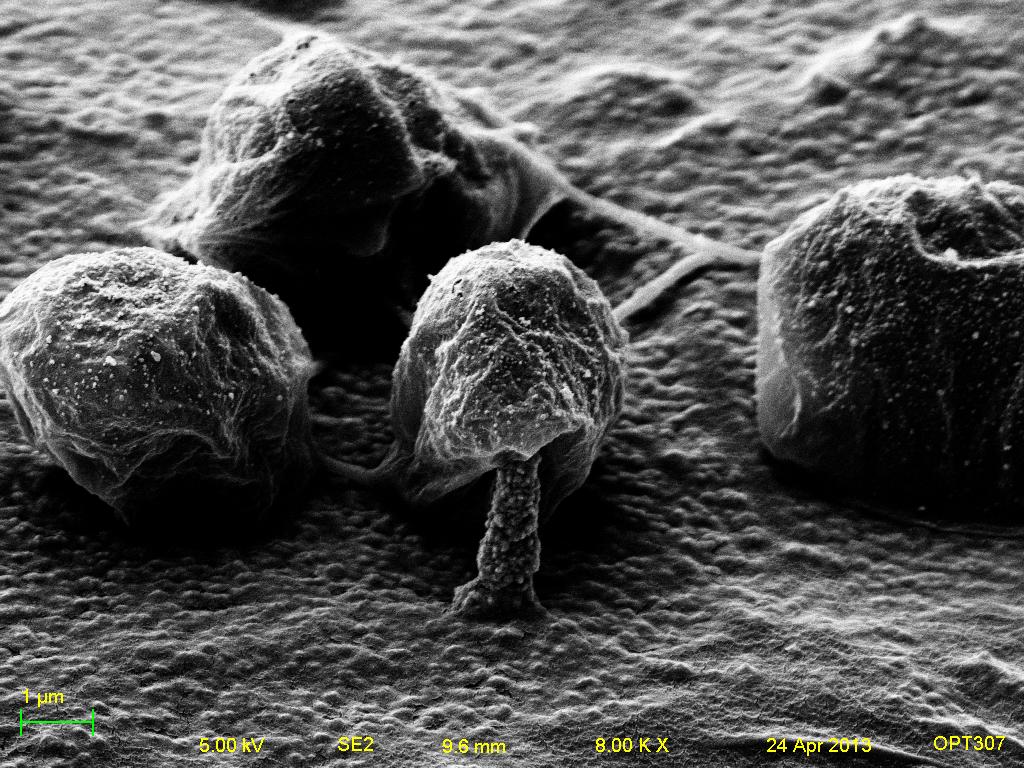
Figure 10. An SEM Image of a Pierced Cell Using SE2 Imaging
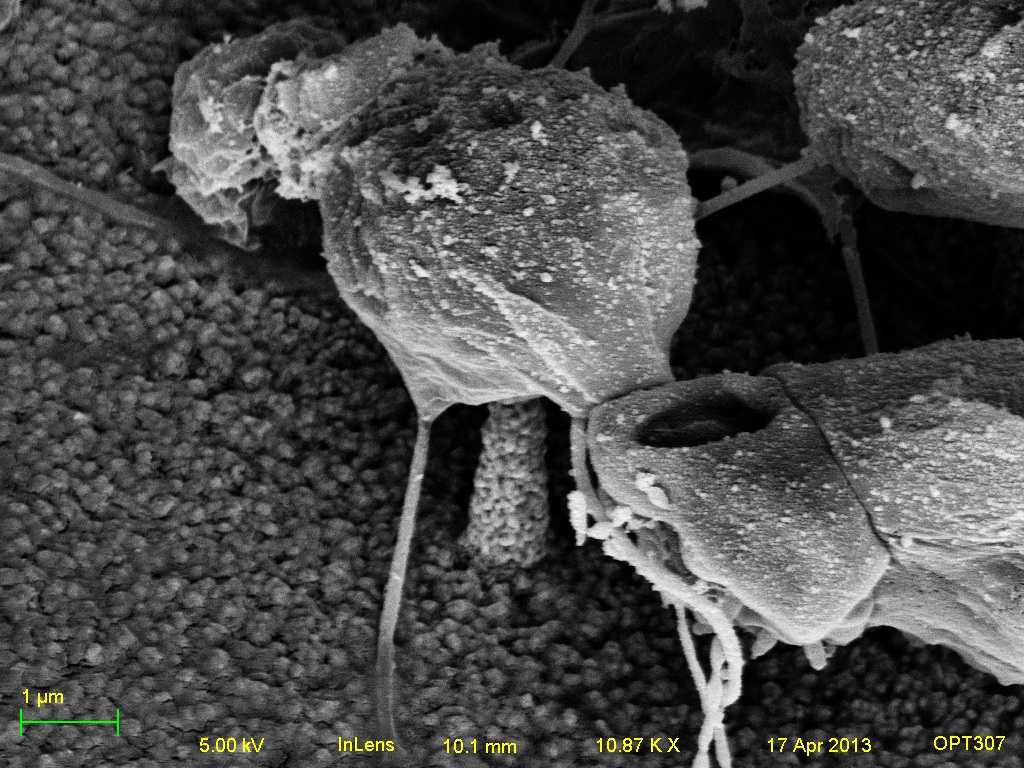
Figure 11. An SEM Image of a Pierced Cell using In Lens Imaging
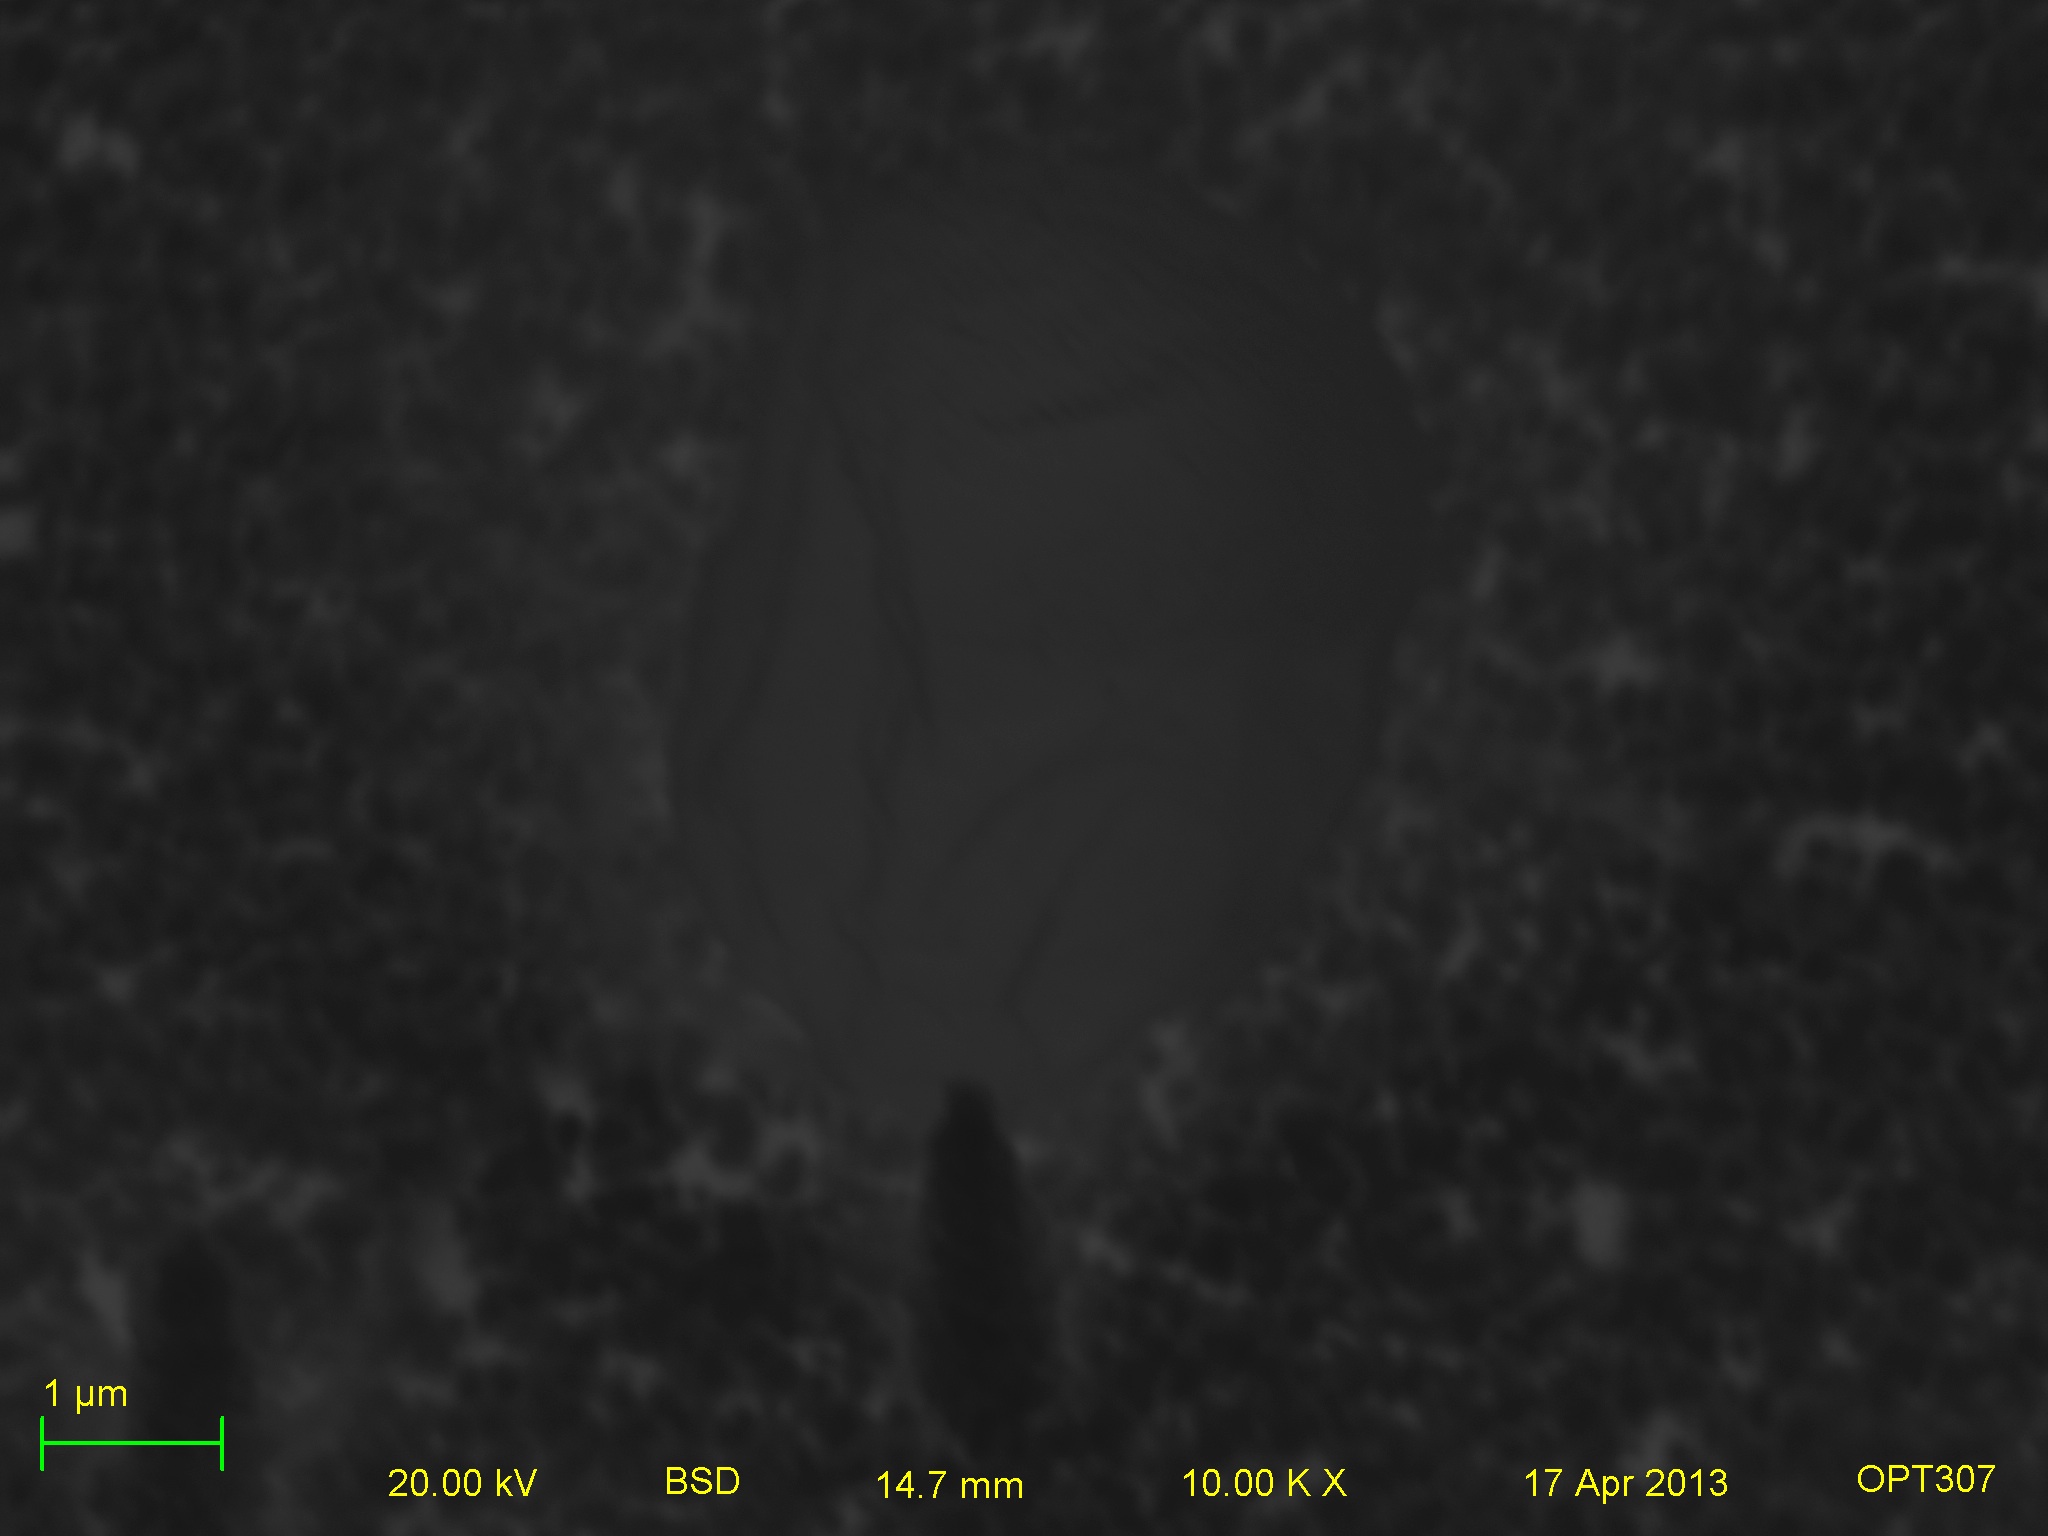
Figure 12. An SEM Image of a
Pierced Cell Using BSE Imaging
The composition varies between the gold needle substrate and the cells. This allows us to see if a cell contains a needle tip or not. The composition can be studied with two tools in the SEM. These are the EDAX system and the elemental mapping. These use x-ray electrons to determine the composition of the region being analyzed. The x-ray electrons interact with the electrons in the element producing a signal that varies for every element.
EDAX shows the level of each element in the region the beam in focused on. What it detects is determined by the strength of the electron beam (accelerating voltage).
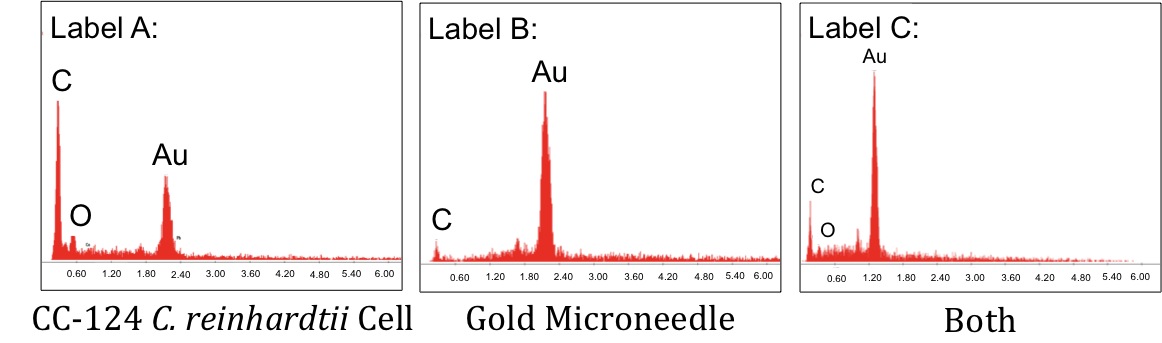
Figure 15. EDAX of (A) C. reinhardtii cell, (B) Au Microneedle, and (C) A cell pierced on a microneedle; Note: Au is seen int he EDAX of the independent cell due to the gold sputter coating
Elemental mapping displays the spatial location of each element throughout the sample. In the elemental map below of microalgae cells on a gold microneedle array we see that the cells have a high concentration of carbon and the other noted elements are only found in the array.
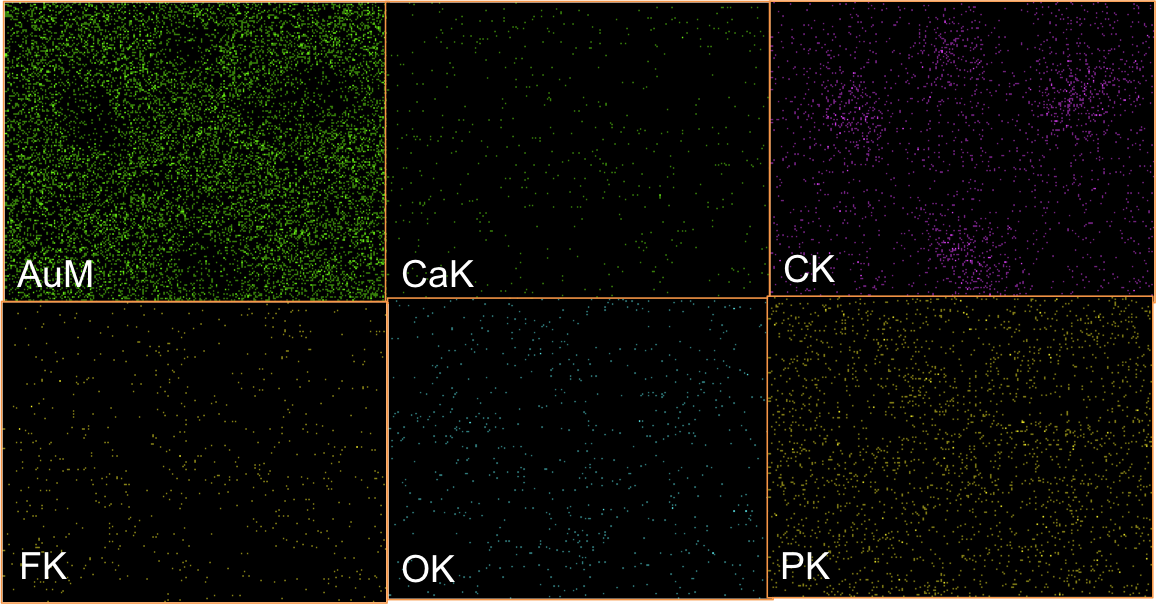
Figure 16a. Elemental Map of C. reinhardtii cells pierced onto Au microneedles
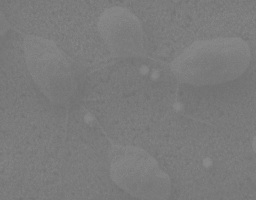
Figure 16b. SEM Image representing region of the sample the Elemental Map is displaying
Using the many SEM settings I could determine that in fact the C. reinhardtii cells were pierced onto the gold microneedle arrays. The BSE setting made it most apparent that the tip of the needle was inside the cell.
Due to this confirmation,
the microneedle array can
now be coated with foreign
DNA to transfect the
cells. The cells will be
tranfected with a
florescent gene that once
grown will demonstrate
that the gene has been
incorporated into the
cells' genome.
Choi, Seong-O, Yeu-Chun Kim, Jeong Woo Lee, Jung-Hwan Park, Mark R. Prausnitz, and Mark G. Allen. "Intracellular Protein Delivery and Gene Transfection by Electroporation Using a Microneedle Array." Wiley InterScience. 8.7 (2012): 1081-1091. Print.
Harell, C. Chad, Zuzanna S. Siwy, and Charles R. Martin. "Conical Nanopore Membranes: Controlling the Nanopore Shape." Wiley InterScience. 2.2 (2006): 194-198. Print.
Mukaibo, Hitomi, Llyod P. Horne, Dooho Park, and Charles R. Martin. "Controlling the Length of Conical Pores Etched in Ion Tracked Poly(ethylene terephthalate) Membranes." Wiley InterScience. 5.21 (2009): 2474-2479. Print.