Introduction
1. Tardigrades
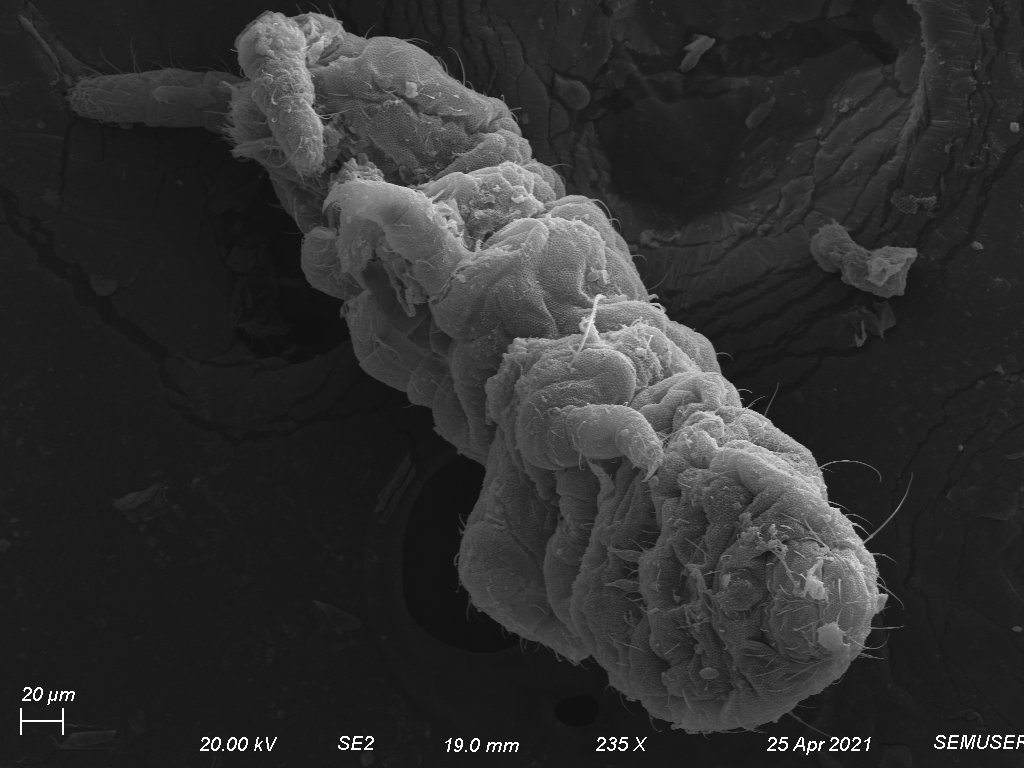
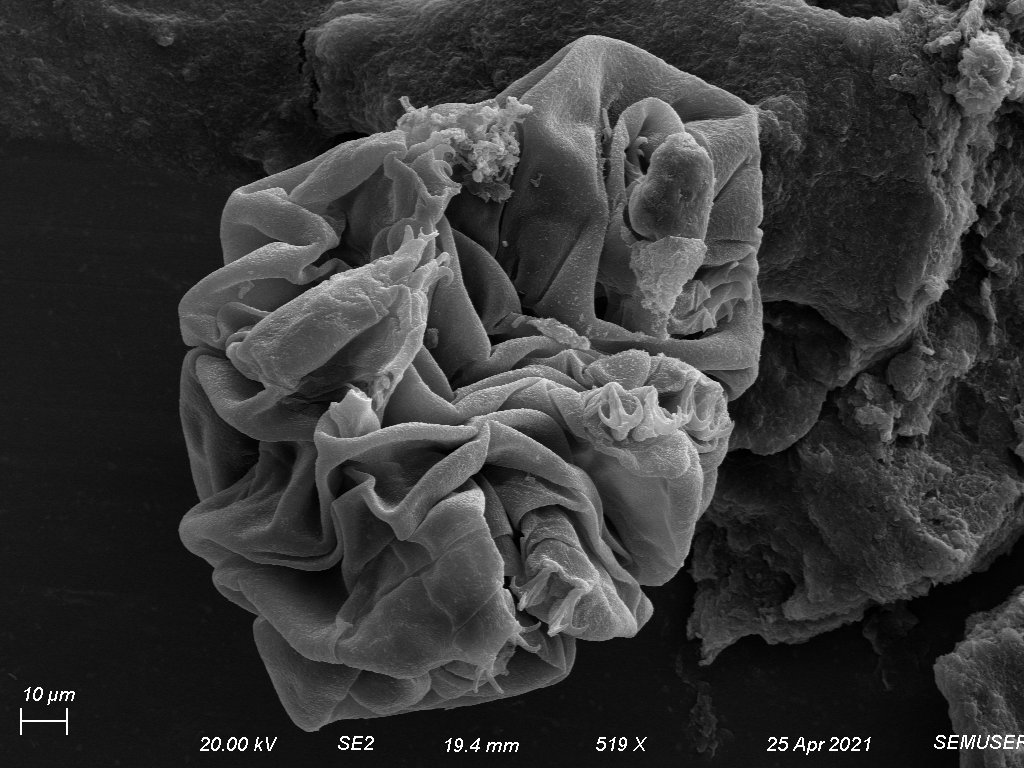
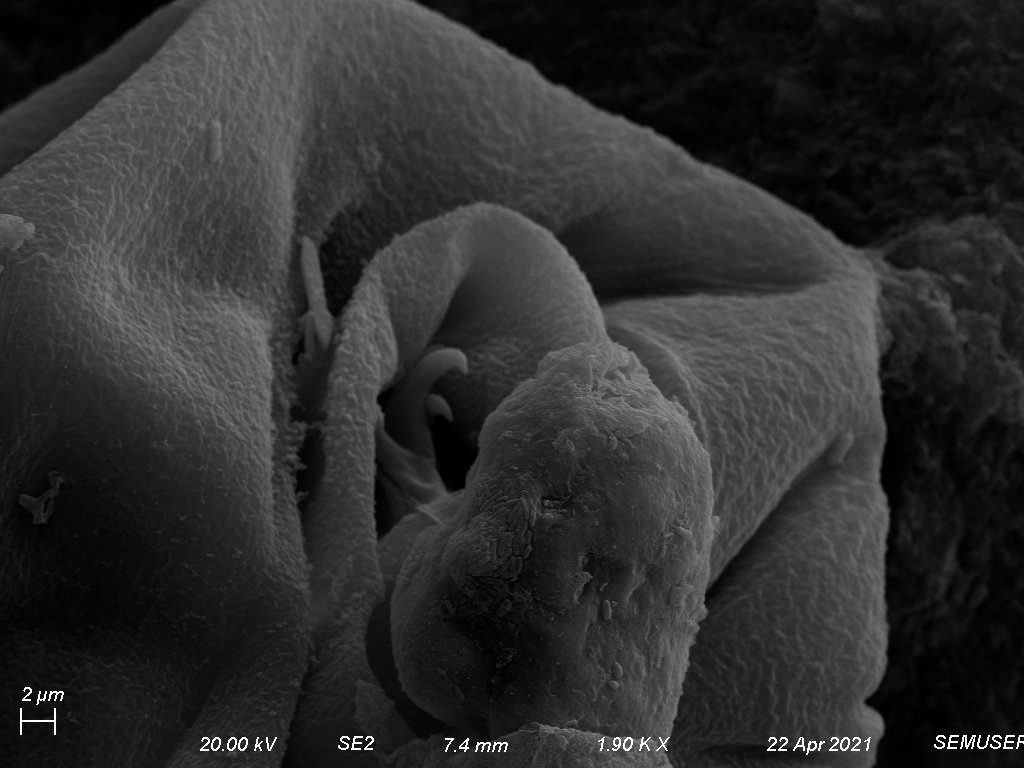
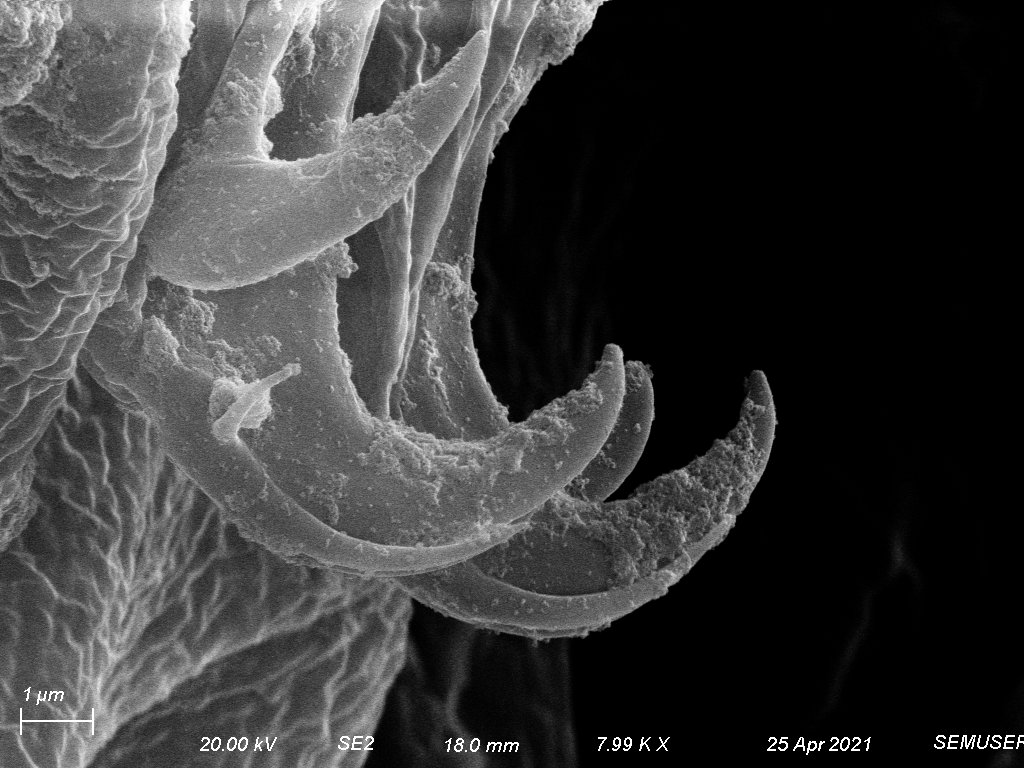
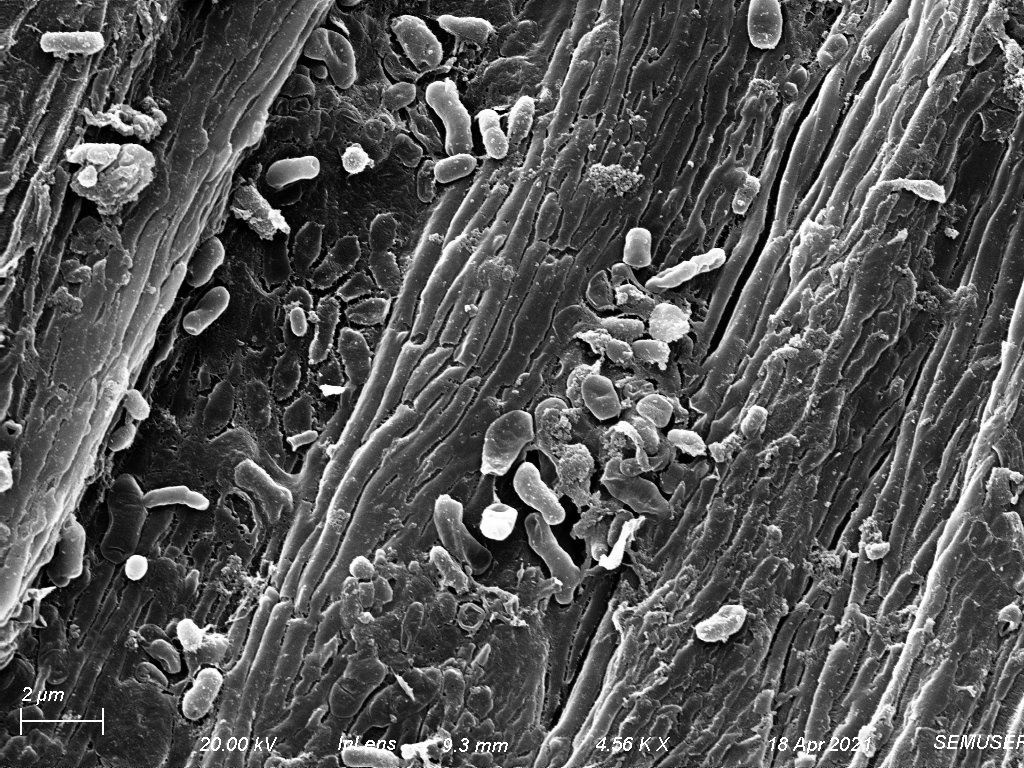
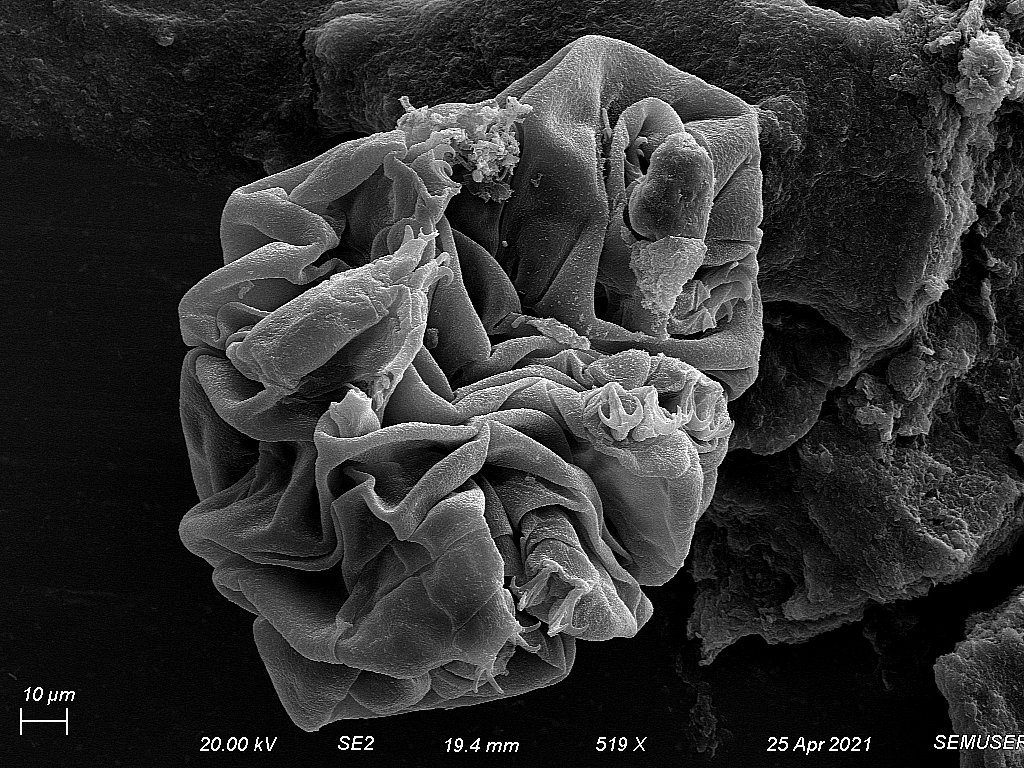
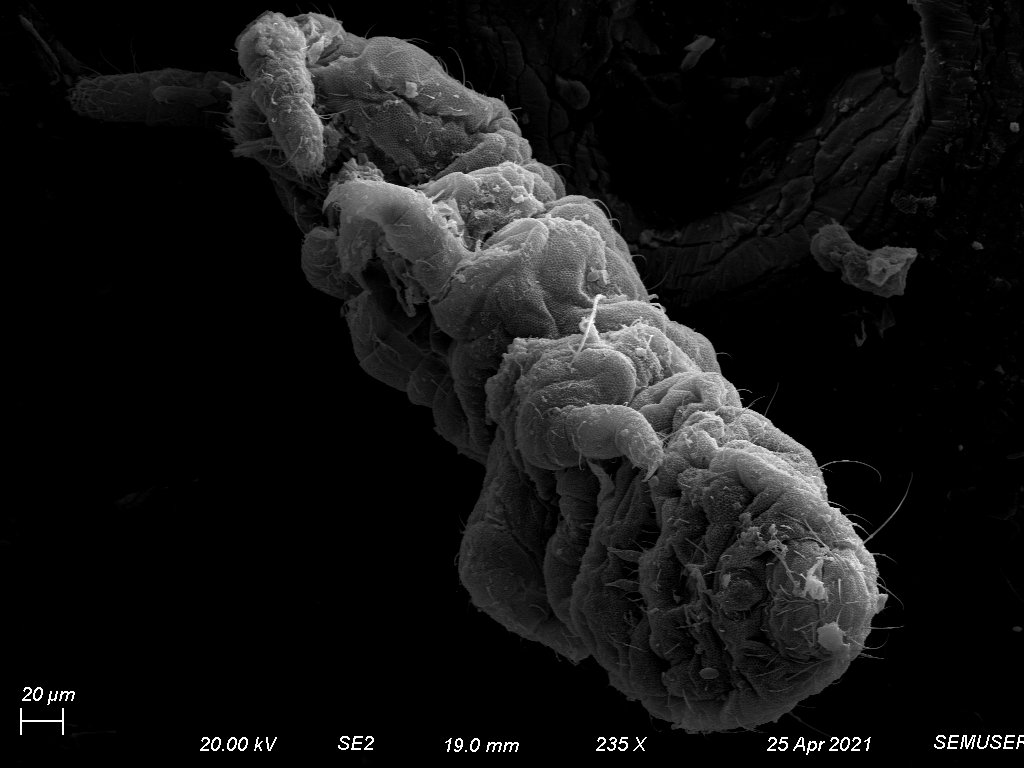
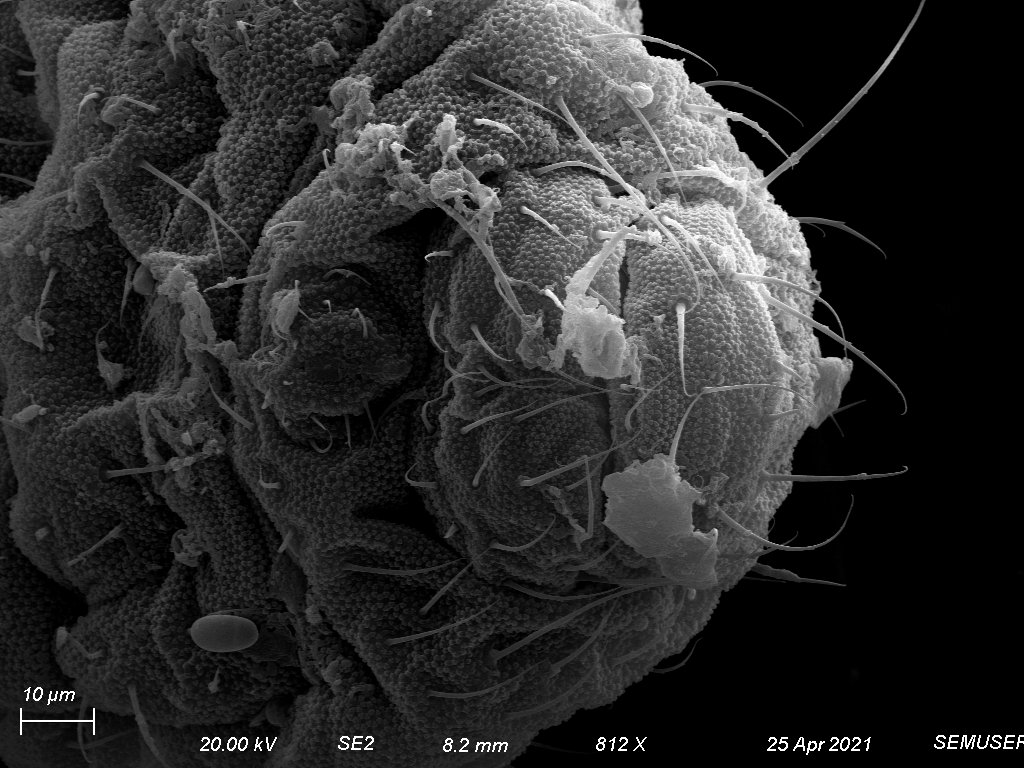
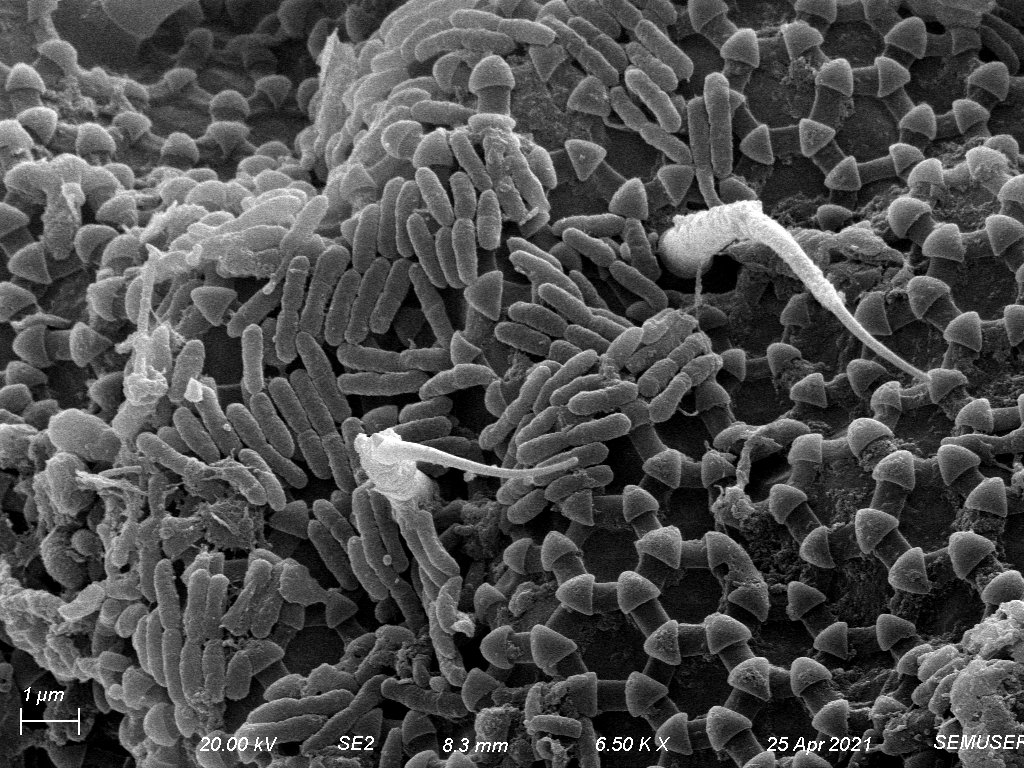
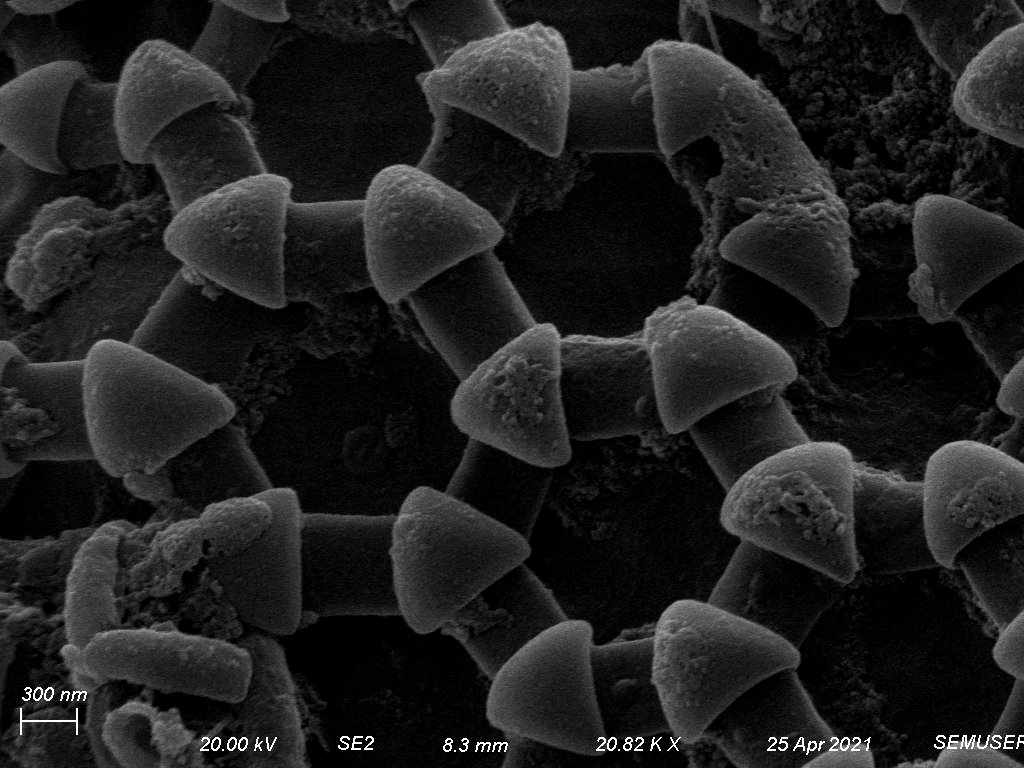
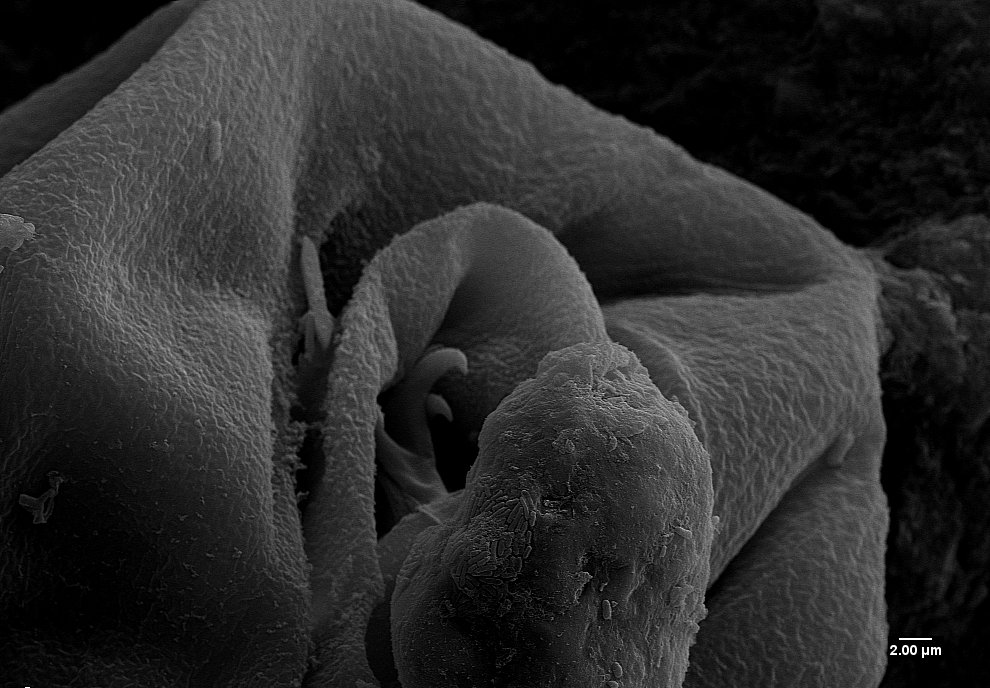
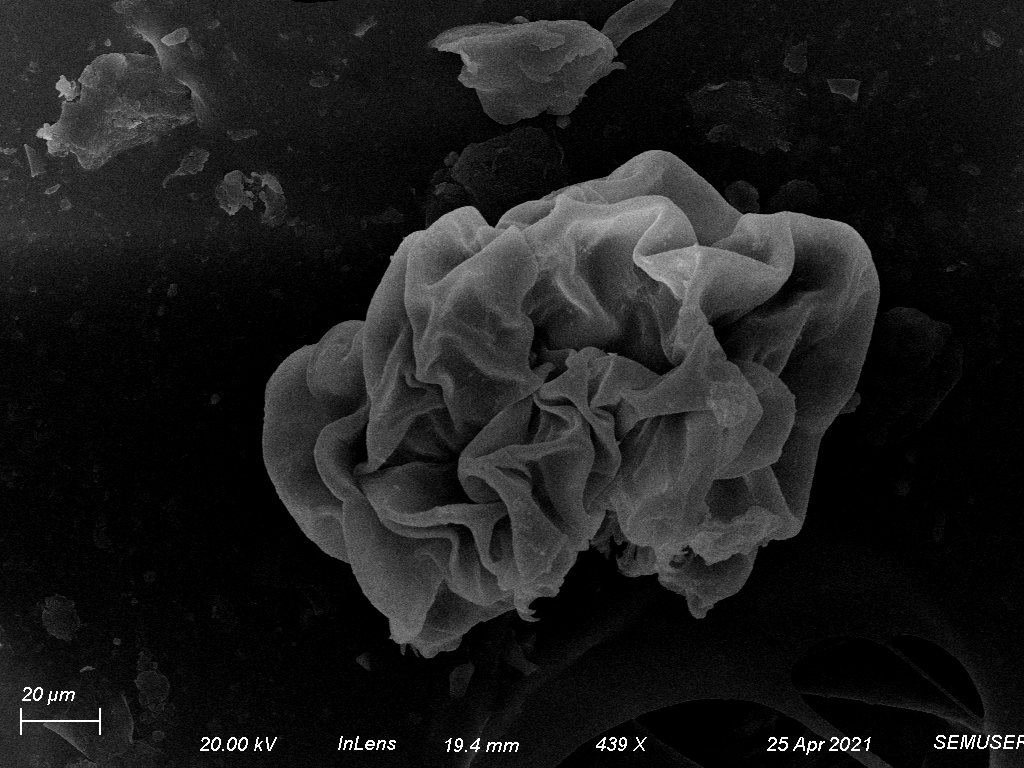
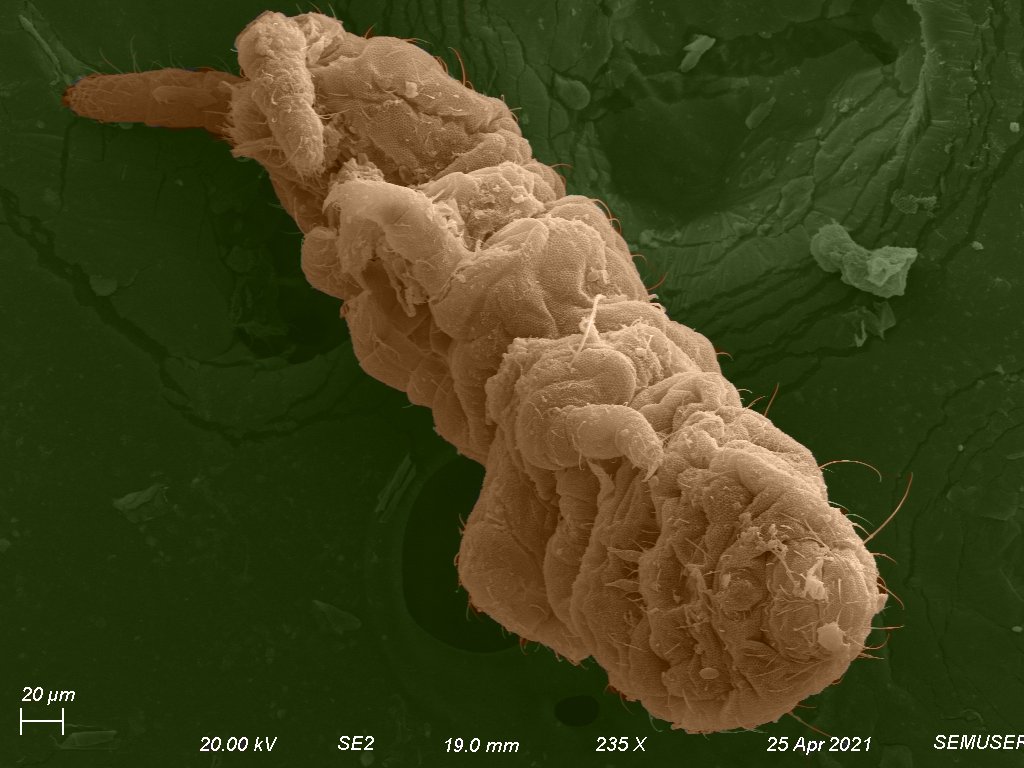
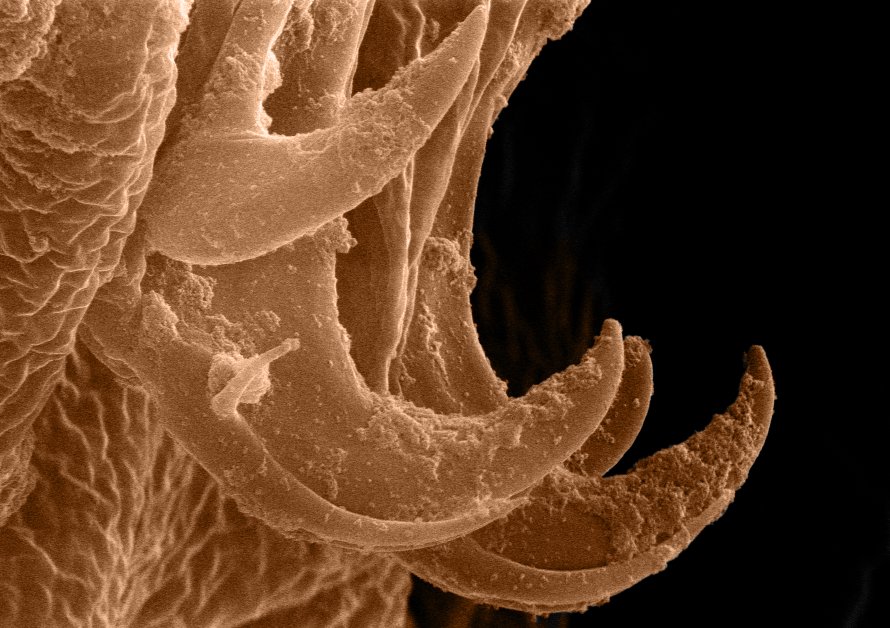
2. Scanning Electron Microscopy (SEM) Tardigrades are able to be viewed through light microscopes since their maximum size is around 0.5 mm but this type of imaging does not show their surface structure as well. Using Scanning Electron Microscopy, we can see the fine details of their surface structures, such as their claws and head structure.
[2].
Methods and Results
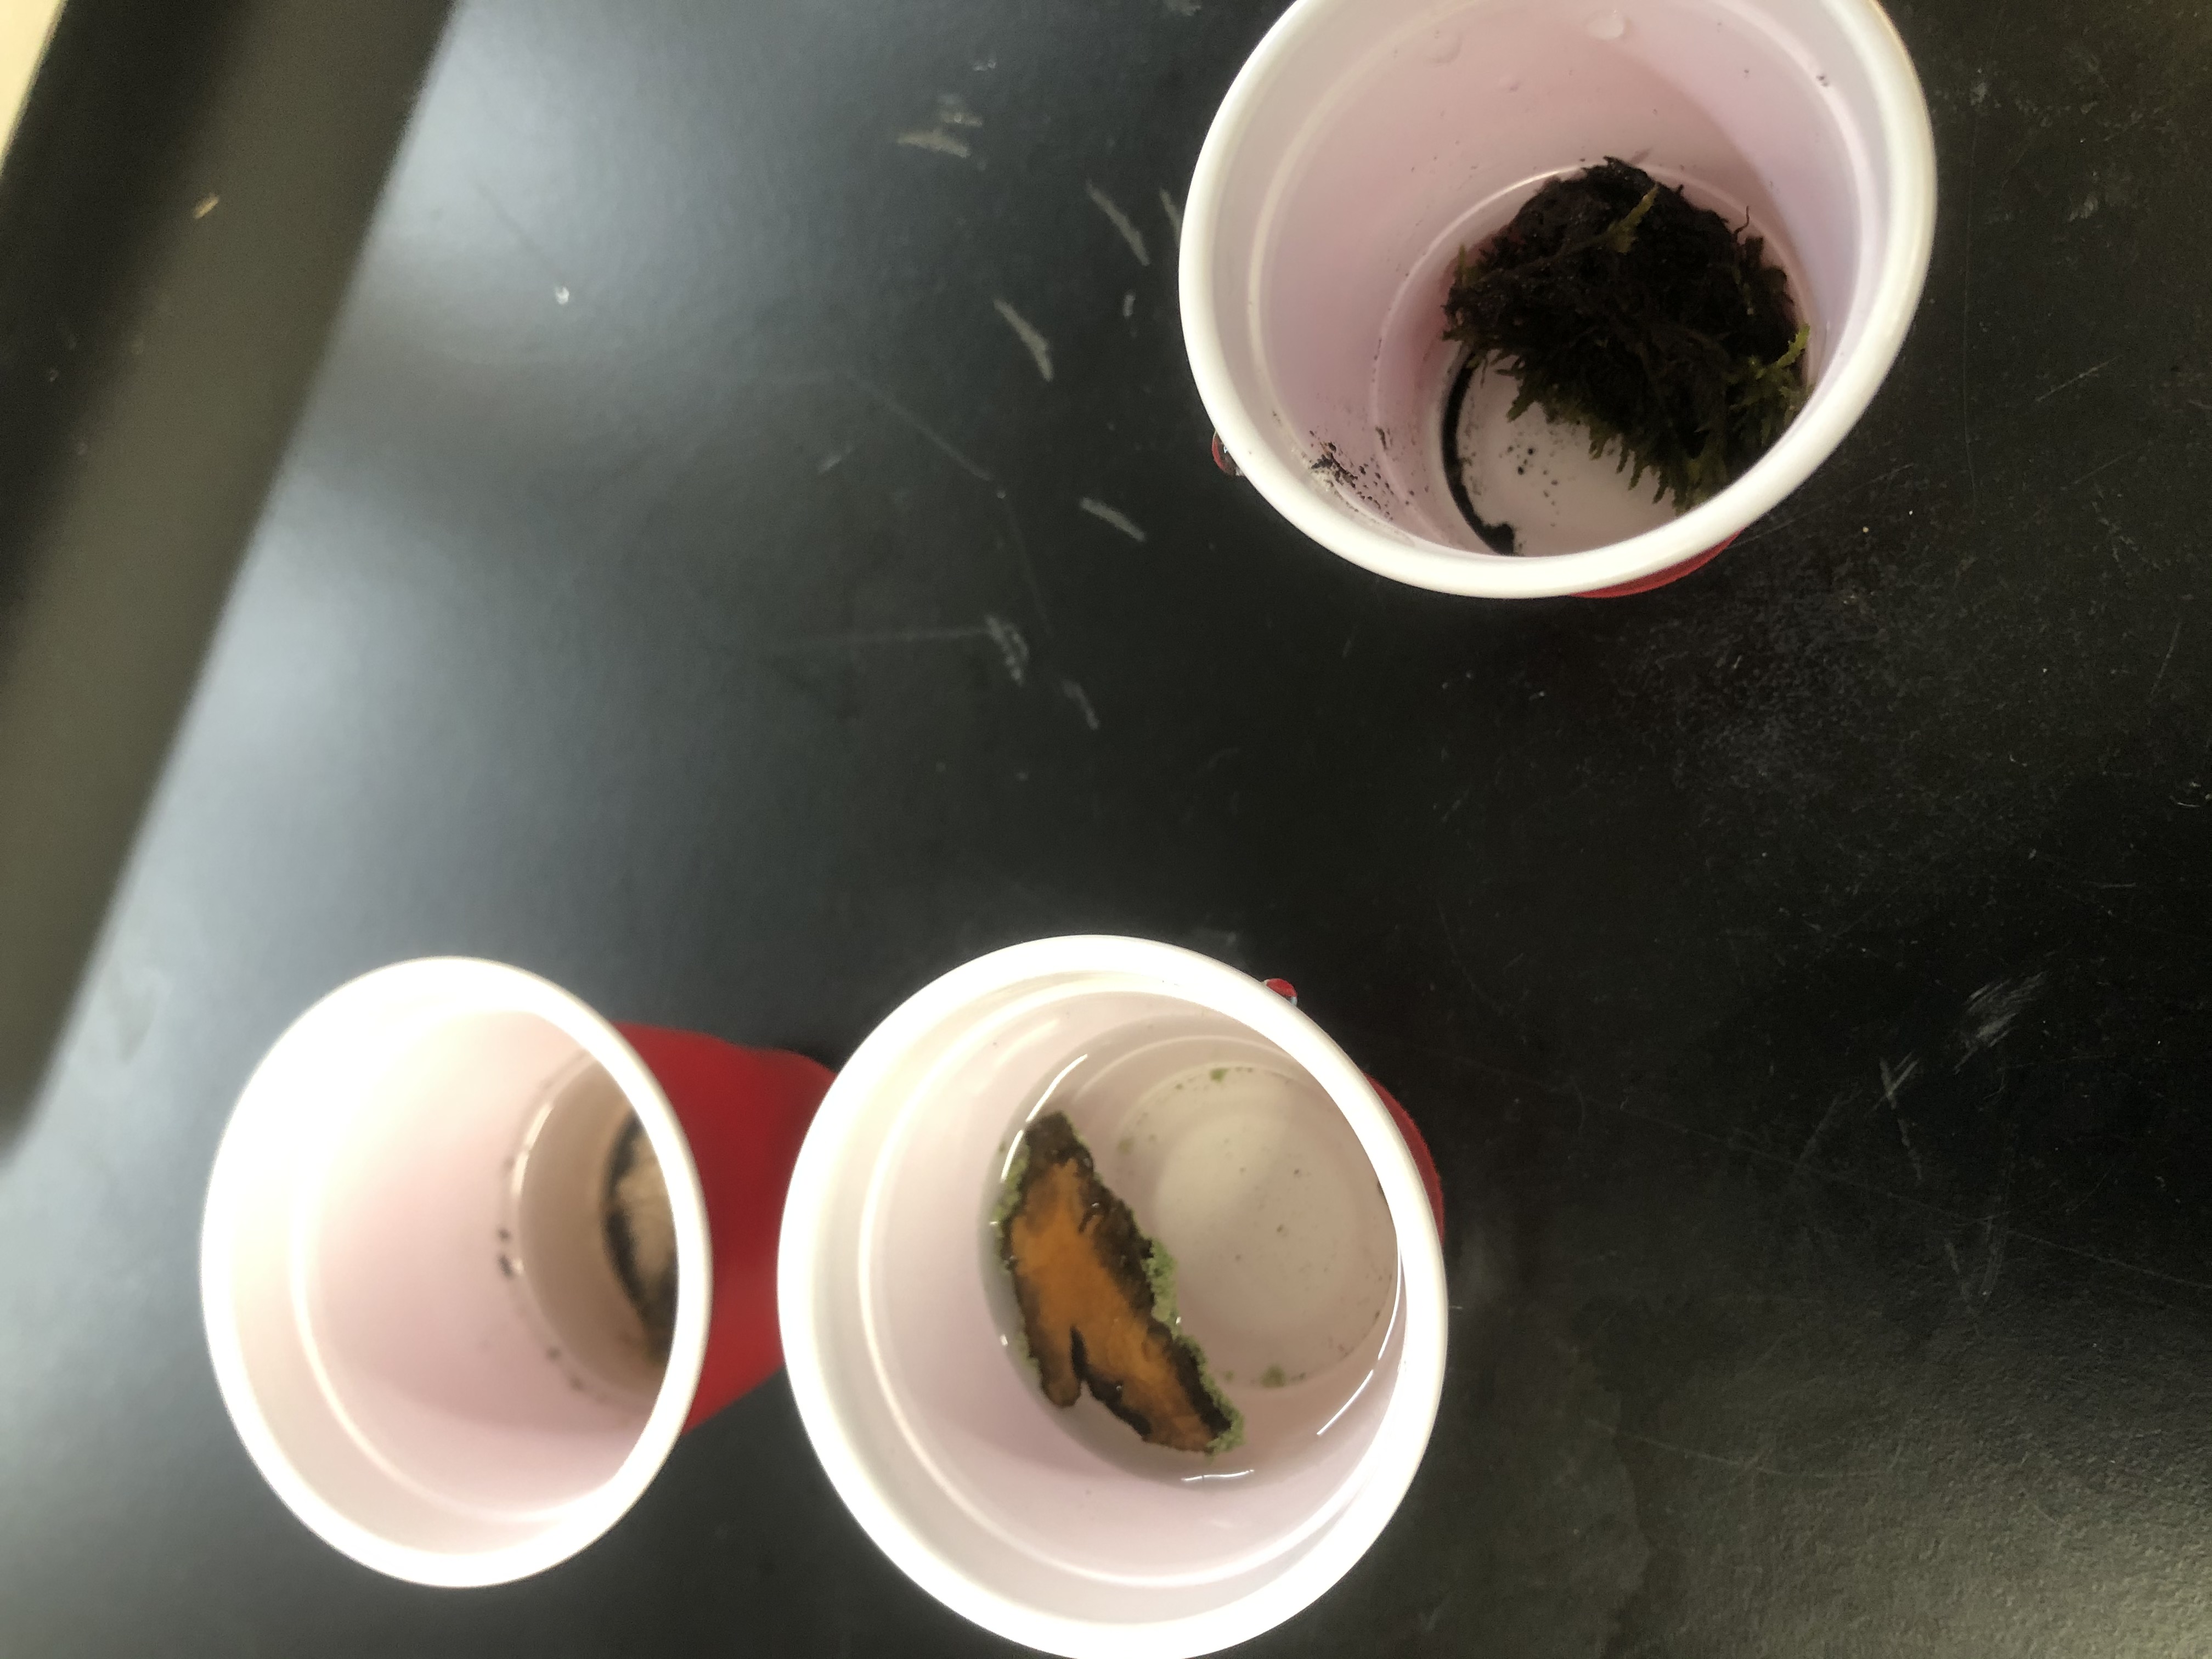
1. Obtaining Samples
To get tardigrades ready for sample preparation moss was collected from around the Riverview Student Housing. The moss was then soaked in water for at least 4 hours then brought into the lab to find the tardigrades. Using a stereoscope tardigrades were then plucked from the sample into a vial that will be used to dry them out through HMDS.
2.HMDS Drying To get the tardigrades ready for Hexamethyldisilazane (HMDS) drying they were first put into a solution with Glutaraldehyde to harden their cellular membrane. After the fixation process the specimens were then dehydrated by steadily increasing the level of ethanol in the solution. Once the ethanol solution is at 100 percent the solution is then switched to a Hexamethyldisilazane solution and the sample is air dried after being submerged in that solution for at least an hour.
3. Stereoscope and Mounting Once the HMDS drying was complete the tardigrades needed to be mounted on the SEM stubs. To do this a stereoscope, sharpened wooden stick, and tweezers were needed. The samples were taken out of the vial and put on a dark surface for better contrast. Then using the stereoscope the samples were picked up using either the tip of the wood or edge of the tweezers. Two stubs used conductive paint to mount the samples while two other stubs used double sided tape to mount the samples. The change occured due to the trouble that I experiances while trying to mount the specimines using conductive paint. With the conductive paint another sharpened wooden dowel was used to apply the paint. The sample needed to be quickly put on the stub as to not let the paint dry before the sample was securly attached.
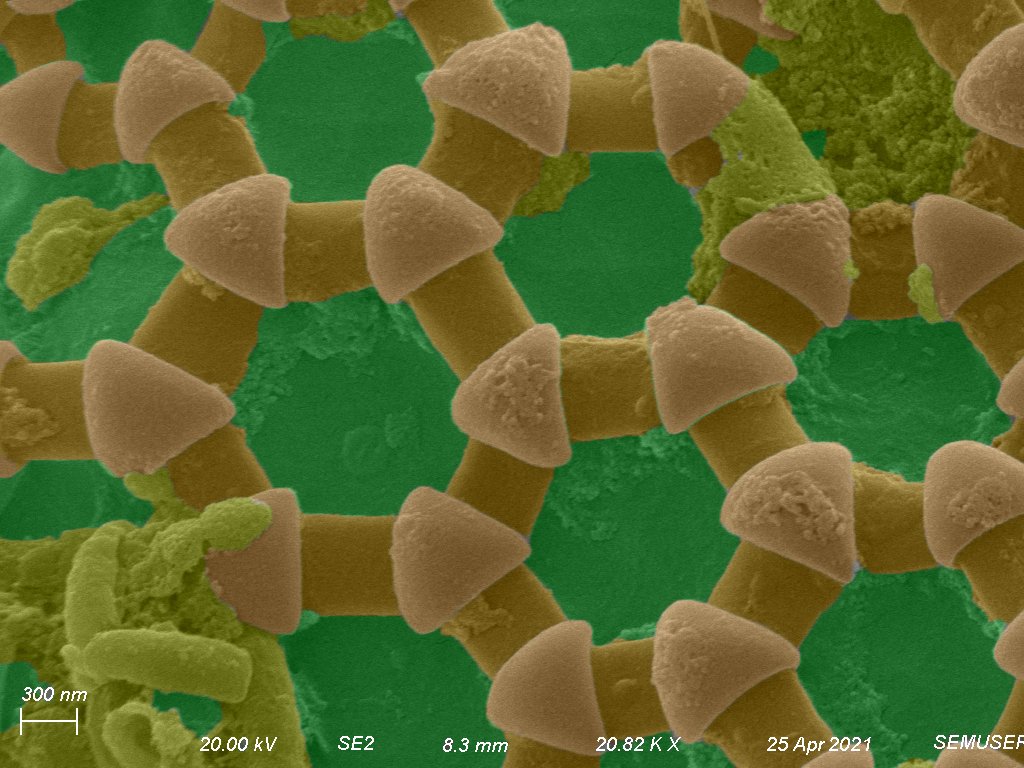
4. Sputter Coating The samples were sputter coated for a total of 190 seconds at 20 mA. Sputter coating is when the samples are inserted into a chamber and the air is transitioned to Argon gas. When the chamber is filled with Argon, a charge is sent through the argon vaporizing gold that is positioned above the samples. This gold floats down and forms islands on the surface of the samples. These islands connect and form a path for the sample to ground better. The stubs that used conductive paint were coated three times with the first coat being 100 seconds, the second coat being 40 seconds, and the third coat being 50 seconds. This was done since the sample was experiencing a lot of charging in the SEM. The other two stubs were coated for 190 seconds to begin with since those stubs were made after the other stubs needed to be coated multiple times.
5.Secondary Electron Imaging After the samples were prepared the stubs were placed on the sample holder for the SEM and inserted into the SEM chamber. The samples were imaged using the secondary electron imaging technique. This was used because I wanted to obtain surface information for the sample and did not need information from materials. Using other forms of imaging such as Backscatter Detection would reduce the resolution of the micrograph and there was no benefit since Tardigrades are mostly carbon and not atomically diverse species.
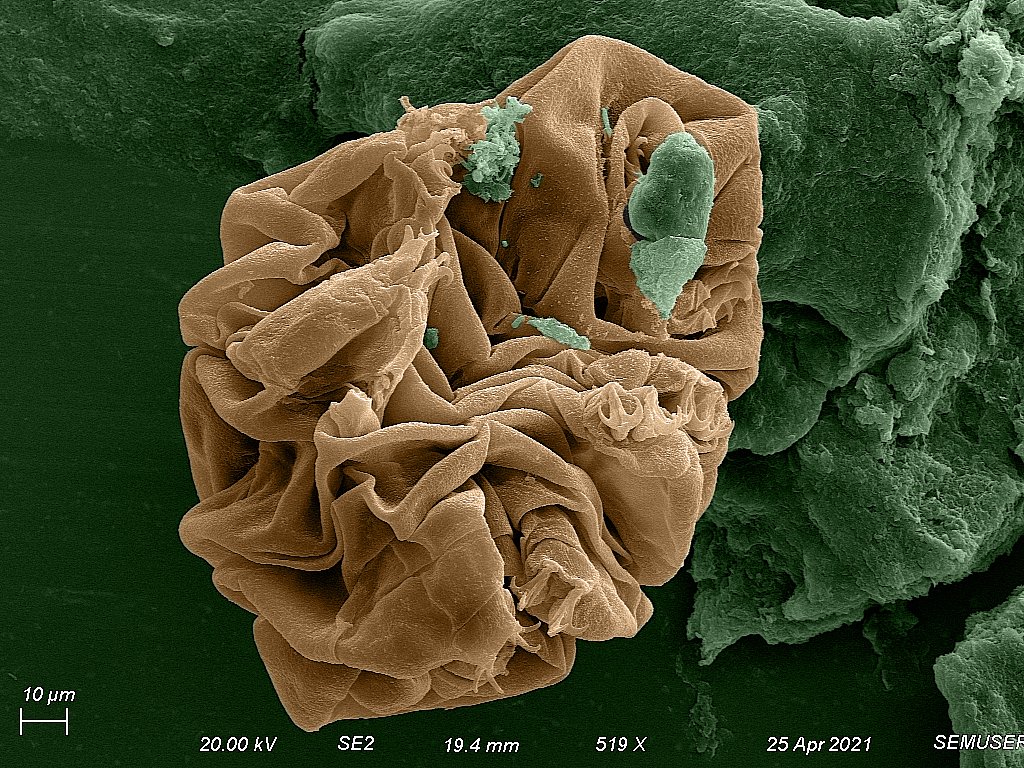
6. Mircograph Image Modifiaction After the Micrographs were produced I decided to modify some of them to produce better looking micrographs that will be used later for colorization. I chose to modify them using ImageJ since the imformation from the micrograph did not need to be kept the same, but I needed to make sure that the modified micrograph did not deviate from the original by much.
7. Colorization With the modified micrographs I then used Photoshop to overlay color onto them. This was to better depict the differences between the Tardigrades and the background. It is important to note that these micrographs were colorized post capture and that an SEM is unable to produce colorized micrographs.
END REMARKS 1. Discussion and Conclusion The purpose of this final project was originally to produce micrographs of Tardigrades in both their active and Tun states. This proved to be difficult given how small they were and how they needed to be prepared. When using the Stereoscope to identify the tardigrades there was trouble finding them since they were semi-transparent in visible wavelengths. After HMDS drying, mounting also proved extremely difficult. Due to their small size and being dry, tardigrades are easily susceptible to static charges and being flung by small forces. When picking them up my hands had to be extremely steady or the tardigrades would be lost in the preparation lab.
I also found that the samples were charging a lot more than I was expecting. Even with the large layer of gold deposited on them from the sputter coating the SEMs aperture needed to be closed down to 10 microns and the raster time needed to be decreased to help with the charging effects. The micrographs were taken with an integration function where the raster speeds were fast resulting in little detail, but the micrograph took 50-94 of these rasters to produce a detailed micrograph at the end.
2. Acknowledgements I would like to thank Biran McIntyre for his help and guidance in this class. He was able to provide crucial experience that really helped when I faced problems like the charging and mounting. I would also like to thank Georgios Atsidaftis for giving me the inspiration behind this project.
3. References [1]Britannica, The Editors of Encyclopaedia. "Tardigrade". Encyclopedia Britannica, 18 Sep. 2020, https://www.britannica.com/animal/tardigrade. Accessed 1 May 2021.
[2]https://microcosmos.foldscope.com/?p=17901
Comments