The Virtual Optics Suitcase is a video series that makes optics demonstrations available to all.
The Team

Sarah Grabowski
Project Coordinator
Customer Liaison
Graphic Designer
Julian Perez-Balan
Document Handler
Scribe
Video Editor
Our faculty advisor is Professor Andrew Berger.
The Customer
This project is affiliated with the Rochester Section of the Optical Society, from which come our two wonderful customers — Dr. Jessica DeGroote Nelson and Dr. Tanya Kosc — who have guided our development of this product.
Process
Motivation

The Optics Suitcase is an educational outreach tool consisting of interactive activities developed by the Rochester Section of OSA and Dr. Stephen D. Jacobs. Traditionally, these engaging demonstrations would be presented in a 45-60 minute presentation, some of which are small experiments the students could take home (“theme-packets”), with the goal of inspiring excitement about STEM careers. The COVID-19 outbreak has made the safe delivery of this material a challenge, so we are creating a virtual version of the Optics Suitcase so it can reach a larger audience, both during this pandemic and beyond.
The Virtual Optics Suitcase is an adaptation of the current Optics Suitcase demonstrations modified to be delivered in a virtual format, manifested as a series of videos. Upholding the spirit of the Optics Suitcase, we strive to keep the material engaging, taking advantage of the medium to incorporate interesting elements in an attempt to compensate for the loss of the hands-on components.
Image Credit: osarochester.org
Description
A series of 10 videos will walk through 10 different optics or material science demonstrations meant to reach an audience of middle school students. Intended to inspire interest in the pursuit of STEM careers, these demonstrations are chosen to exhibit a variety of colorful or surprising phenomena – some of which can be done with everyday materials that can be found around the house!
Specifications
Discussions with our customers gave rise to the following specifications:
- Our product must have
- 3 videos containing the original Optics Suitcase demonstrations
- 3 videos containing the theme packet experiments (traditionally take-home materials)
- Total presentation time not to exceed 55 minutes
- Video content modularized to retain student attention
- It would be nice if our project included
- Additional lesson material that is informative and on par with current topics
- An instruction packet for teachers who wish to present the content themselves
- We are not responsible for developing new theme packets or physical materials to send to students.
Video Outlines
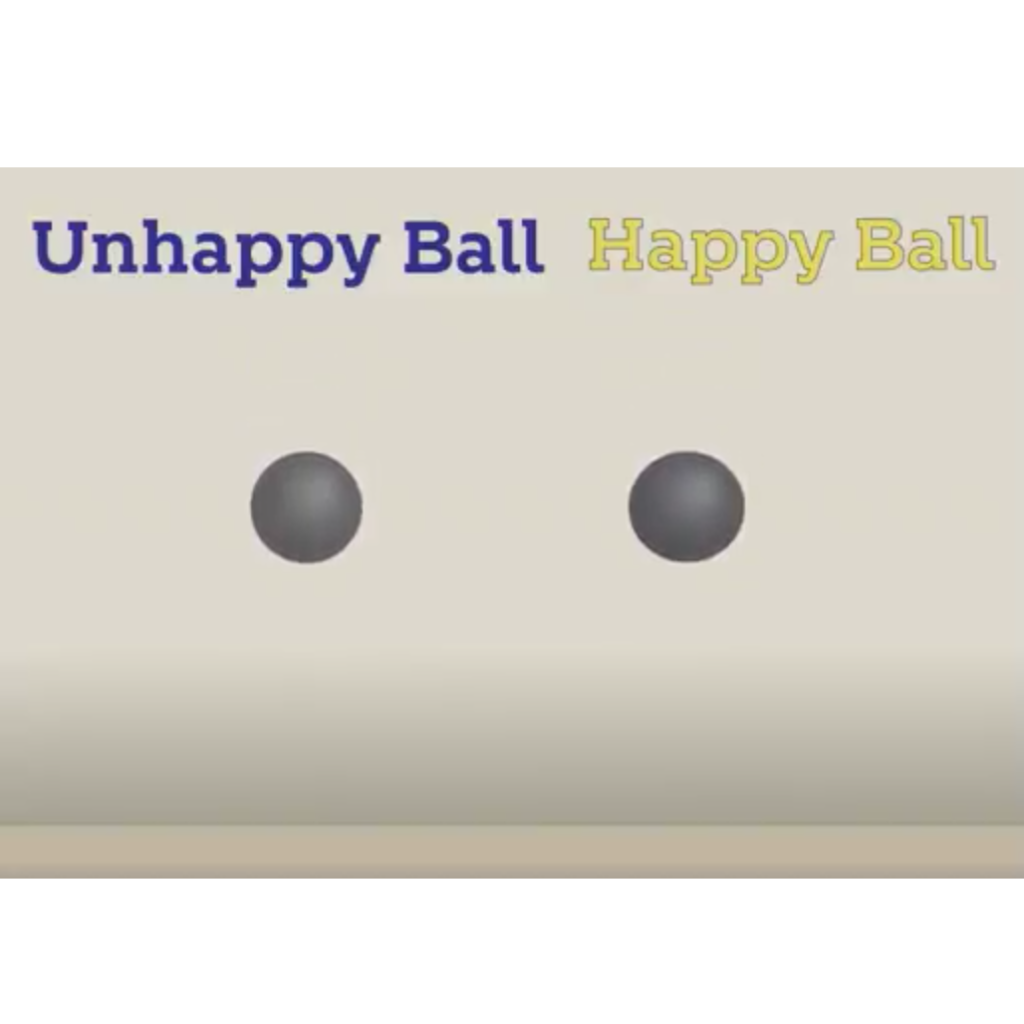
Happy/Unhappy Balls
- The video is started by showing both balls – highlighting their identical size, weight, shape, color etc.
- The balls are then dropped simultaneously from the same height.
- Rhetorical questions are then asked to encourage discussion around why one ball didn’t bounce while the other did.
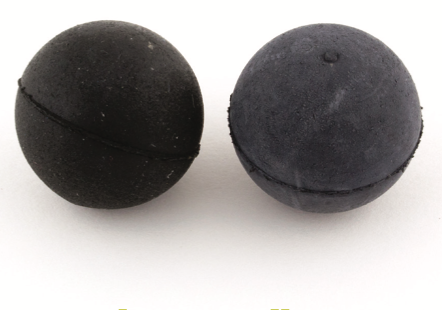
Happy and unhappy balls. Image Credit: Rochester OSA
- This is followed by an explanation of the difference: that the rubber of one ball has been vulcanized while the other hasn’t.
- The demonstration is continued by comparing two “happy” balls — one one of which has been chilled in a freezer to reduce its bounce.
- The discussion is then extended to material science in other applications such as the selection of material for a rocket ship.
- At the end, the discussion is tied back to optics by connecting vulcanization to different material treatment processes such as annealing.
Rainbow Peephole
- Opens with the Rainbow Peephole placed in front of the camera lens, and string lights behind the presenter.
- Questions are asked to encourage curiosity such as “Where do the colors come from?”
- It is then explained that white light is composed of all colors.
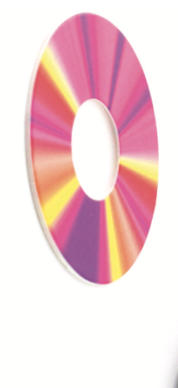
Rainbow Peephole.
Image Credit: Rochester OSA.
- Other light sources are then brought on screen to investigate the different patterns created: an incandescent bulb, a Mercury vapor lamp with a green light filter, and a Helium gas discharge tube.
- To describe diffraction gratings, an AFM image of the peephole surface is shown, emphasizing micron scale, then explaining that the texture on the surface splits up the light based on color via diffraction.
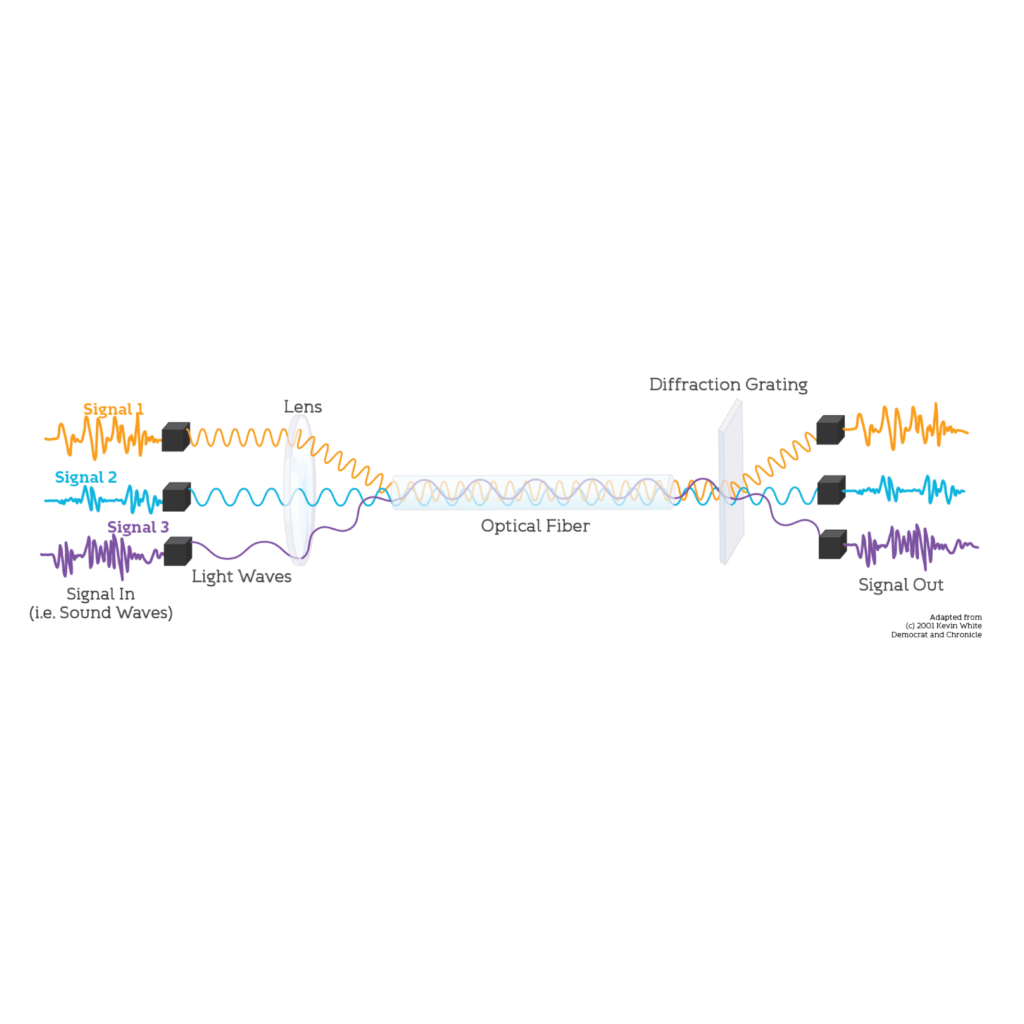
- To conclude, diffraction is linked to its use in telecommunications.
Seeing Heat
- First, the heating pad is shown on camera, accompanied by a physical description — a packet of red liquid, at room temperature, with a small metal disk inside.
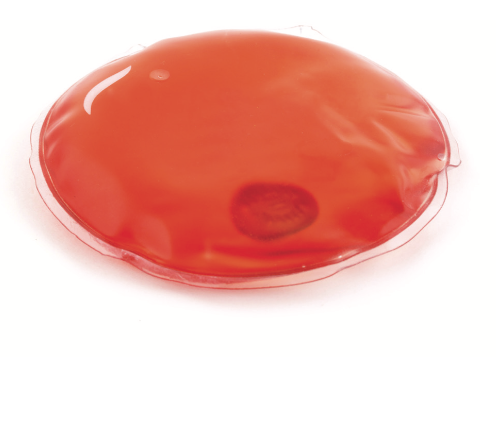
Heating pad. Image Credit Rochester OSA.
- After clicking the metal disk, a reaction is instigated and the changes in the pack are narrated such as an increase in firmness as well as temperature.
- Since students cannot experience the rapid changes in the pack themselves, the reaction is also shown through an IR camera to visualize the drastic change in temperature.
- The reaction is then explained as an exothermic reaction in a supersaturated solution — without going into too much detail — that is initiated by pushing liquid molecules through the perforations in the metal disk.
- Consistent with the effort to emphasize STEM careers and applications, this is tied to chemistry and the role of chemists in creating practical products.
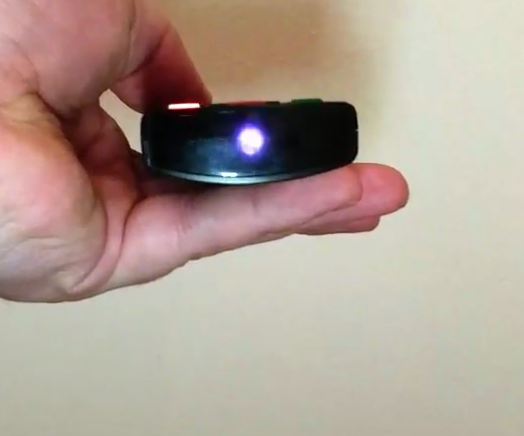
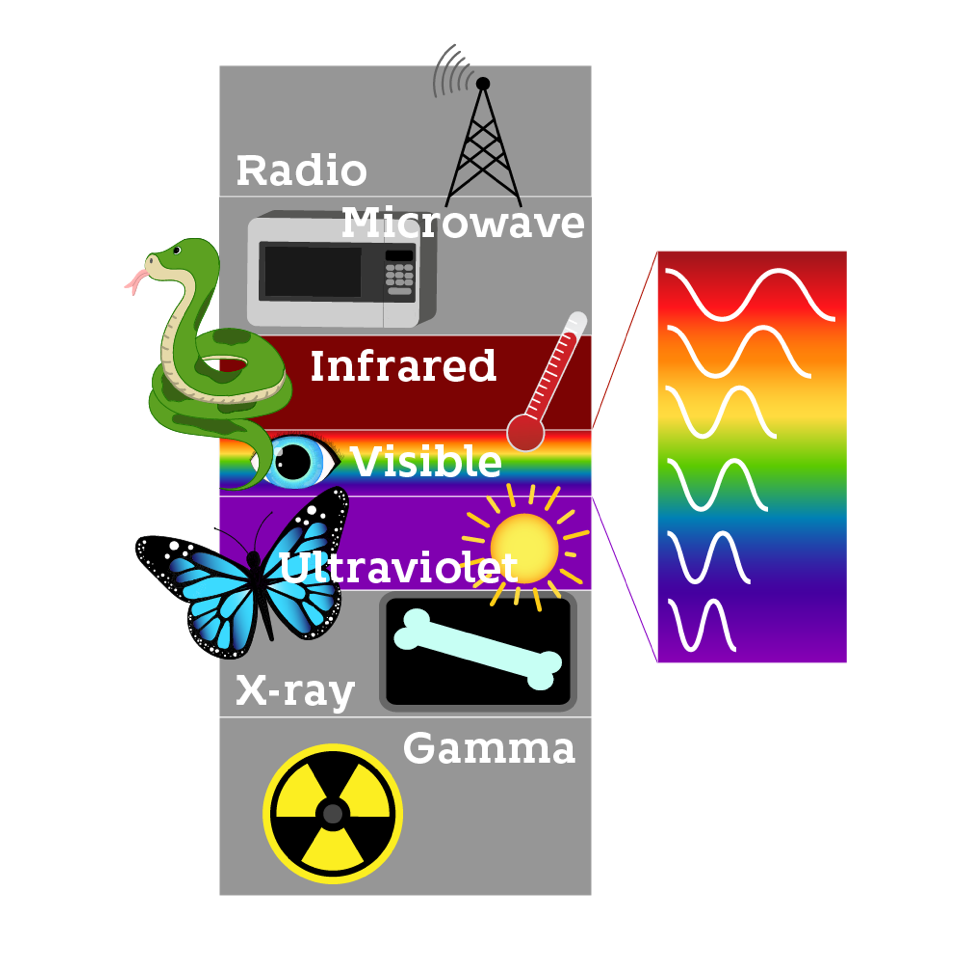
Invisible Light
- This video begins with a discussion on the basics of infrared light, linking back to the IR camera used in the previous video.
- A TV remote is then introduced as using a type of IR light to transmit signals to the television.
- Then, using a cell phone camera it is demonstrated that some cameras, especially in phones, can sense this “invisible light”.
Light from a TV remote is visible through a cell phone camera.
- The electromagnetic spectrum is introduced to place IR light in context and broaching the topic of wavelength, highlighting how visible and UV light compare to IR.
- Animals that can see (or sense) outside of the visible, such as butterflies or snakes, are presented as such to emphasize that it is not just cameras that can see other types of light.
- This topic concluded with a discussion of the integral role that EM radiation plays in modern technology.
Magic Shield
- The topic of electric fields is introduced via the analogy of magnets and their associated magnetic fields.
- EM waves are briefly described as propagating electric and magnetic fields.
- After emphasizing that cell phones work by receiving and transmitting these EM waves, a phone is wrapped in aluminum foil and it is demonstrated that a phone surrounded by a conductor is unable to receive calls.
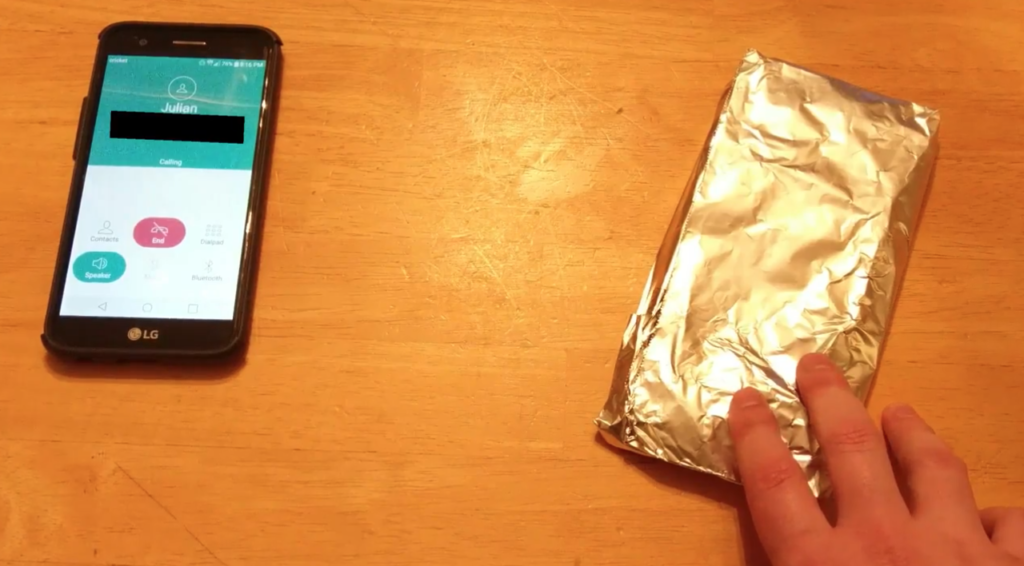
Attempting to call a phone wrapped in aluminum foil.
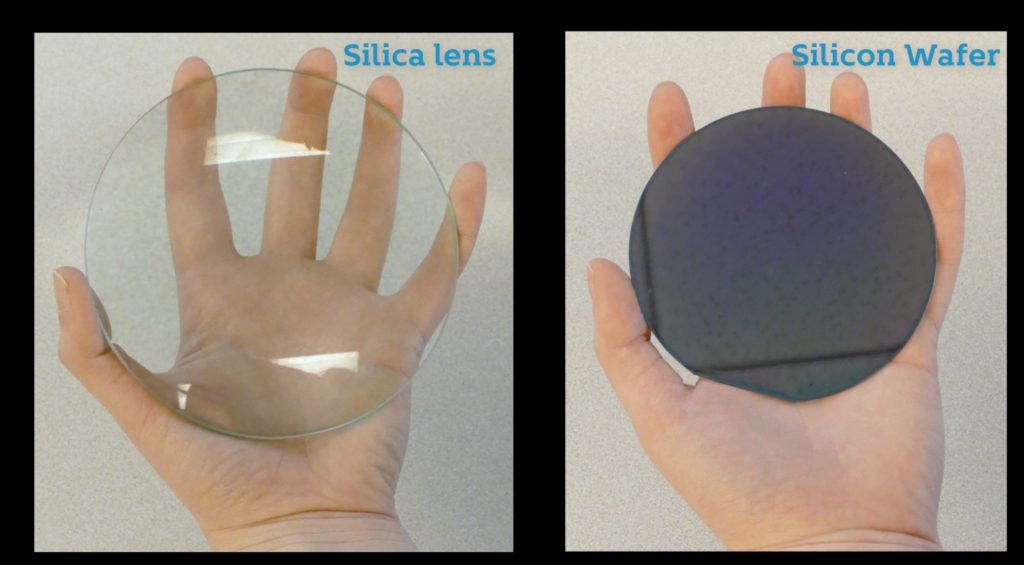
Silicon… Silica… What’s the Difference?
- To open this video, a wafer made of polished single crystal silicon and a silica lens are shown to the camera, and questions are asked to encourage students to guess what they are.
- The two materials are then compared:
- The lens is made of SiO2 (silica), which is described as essentially sand heated to around 3000 degrees Fahrenheit, at which point it melts into the foundation of glass.
- This transparent lens is then contrasted with the reflective silicon wafer (often called a “mirror”) made of a pure elemental substance (Si).
- The periodic table of the elements is introduced to highlight the differences in chemical composition.
- The viewer is then shown images of both of these objects through an IR camera, and are asked to guess which is which.
- Silica, while transparent in the visible, is opaque in the infrared, and the silicon wafer displays the opposite pattern.
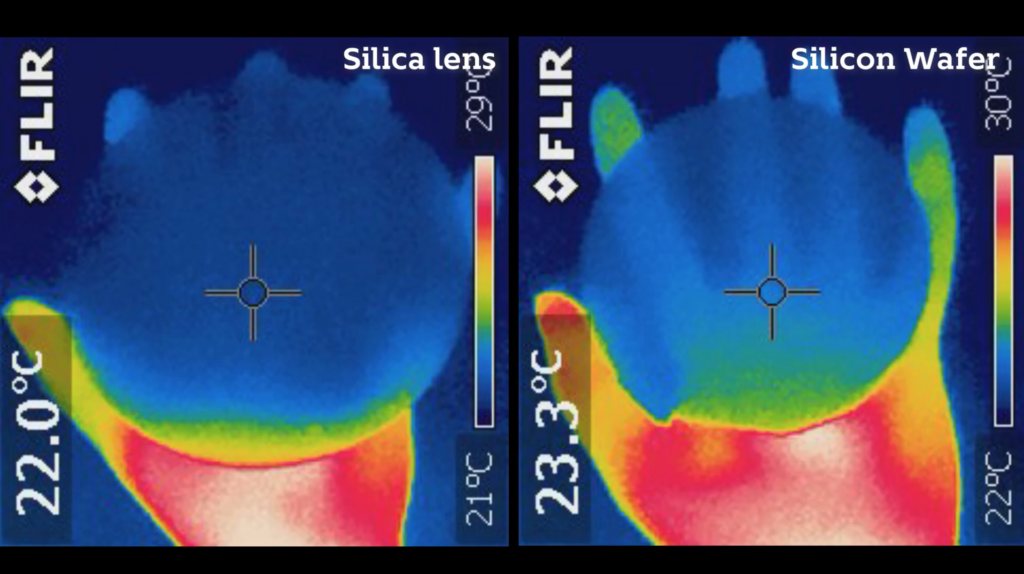
Lens and wafer in the IR.
- Tying it back to STEM careers, the importance of different material properties, and production processes, in optical systems is highlighted as enabling much modern technology.
Water Lens
- To demonstrate the refractive power of water, students are instructed to carefully place a small water droplet on a cell phone screen to magnify the individual pixels.
Phone screen pixels magnified by a water droplet.
- The reason that colors are visible in this water droplet is explained by the arrays of pixels, each emitting a combination of red, green, and blue to recreate virtually all colors that make up the screen of a cell phone.
- Visualizing this effect, viewers are shown an Excel spreadsheet made up of cells with varying levels of red, green, or blue, that once zoomed out creates an image of Rush Rhees Library.
- It is then explained that the water droplet is working like a magnifying glass since water is able to transmit and bend light just like glass.
- Small plano-convex lenses are made out of Jell-O to further demonstrate that refraction is not limited to glass.
- As the material and shape of lenses are crucial to their functionality, this video is wrapped up by connecting these different types of lenses to the role of optical engineers and lens designers in choosing how to create lenses to perform a certain task.
Liquid Rainbow
- This video starts by recalling the everyday experience of seeing colors in bubbles or in oil spills.
- Instructions to make a soap thin film at home are presented next.
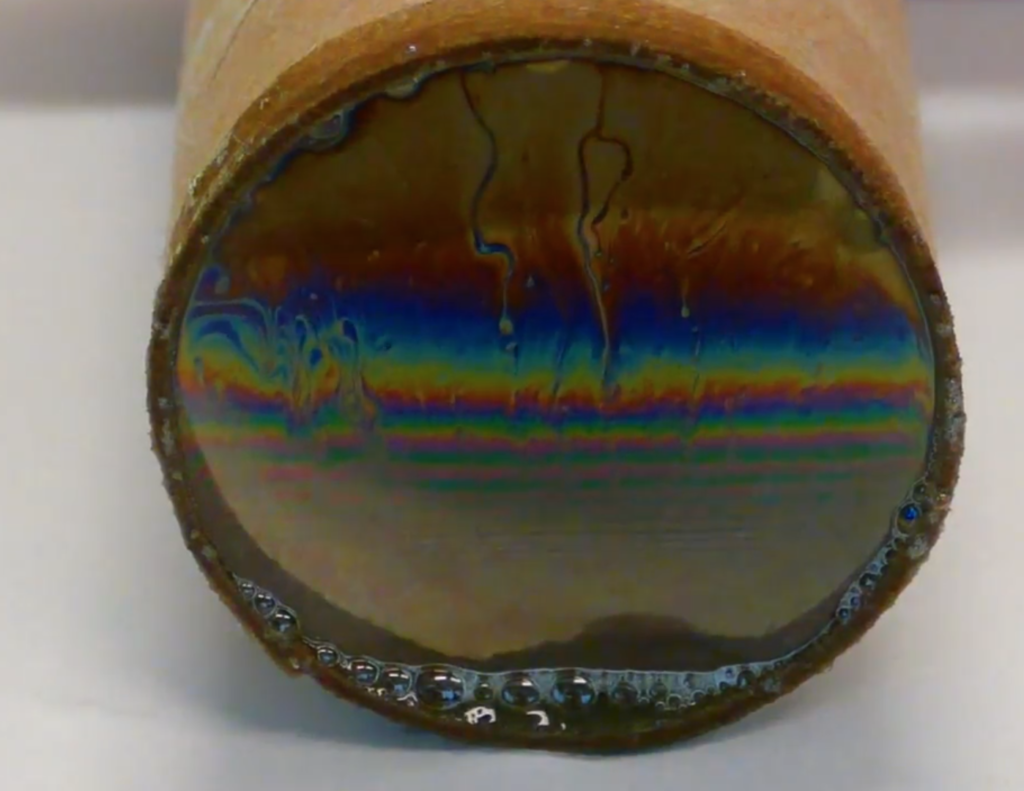
Thin film interference causing colored stripes across soap film.
- Using this film of soap across a cardboard tube, thin film interference is described.
- Connecting back to the IR coating that cell phone cameras lack (as mentioned in the Invisible Light video), the more technical applications of thin films are described, including their used on lenses to give them different properties, concluding with the field of thin film optics where engineers investigate clever uses for this phenomenon.
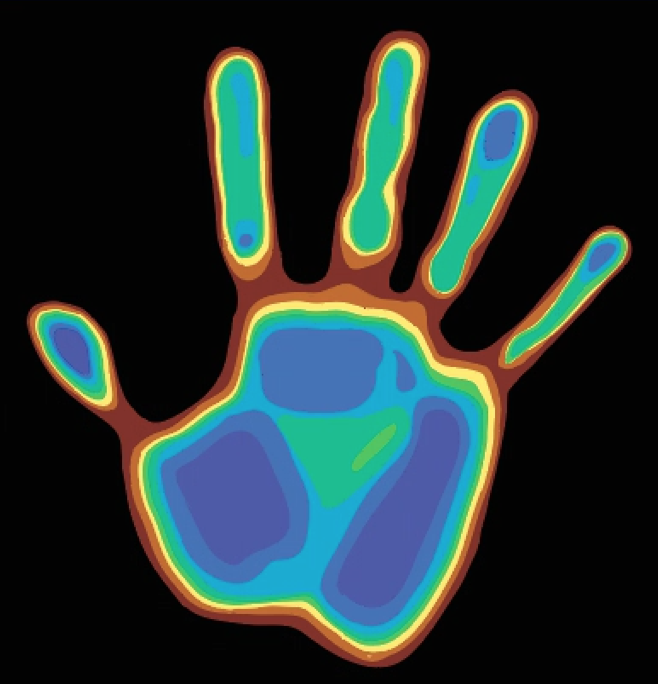
Magic Patch
- This video centers around a sheet of micro-encapsulated cholesteric liquid crystal, which looks like an unassuming sheet of black plastic until selective reflection is induced by a change in temperature.
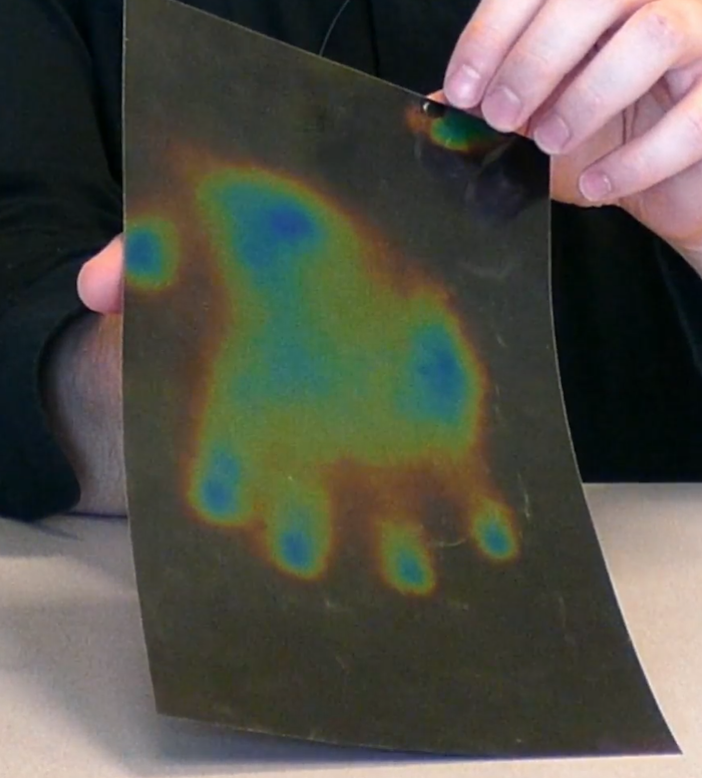
Hand behind CLC sheet.
- Pressing a hand against the back of the sheet, viewers are asked what the origin is of the colors that form the shape of your hand on the sheet.
- Breaking down the CLC sheet into its component layers, it is then explained that different temperatures cause different wavelengths in the white light to be selectively reflected in the CLC material layer.
- Springs are used as an analogy to describe how the spacing of the molecular layers causes different wavelengths to be reflected.
- This is then related to examples viewers may see in everyday life, such as mood rings or fish tank thermometers.
- A small patch of this CLC sheet is then constructed on camera.
- In conclusion, the applications of liquid crystals are mentioned such as in LCDs.
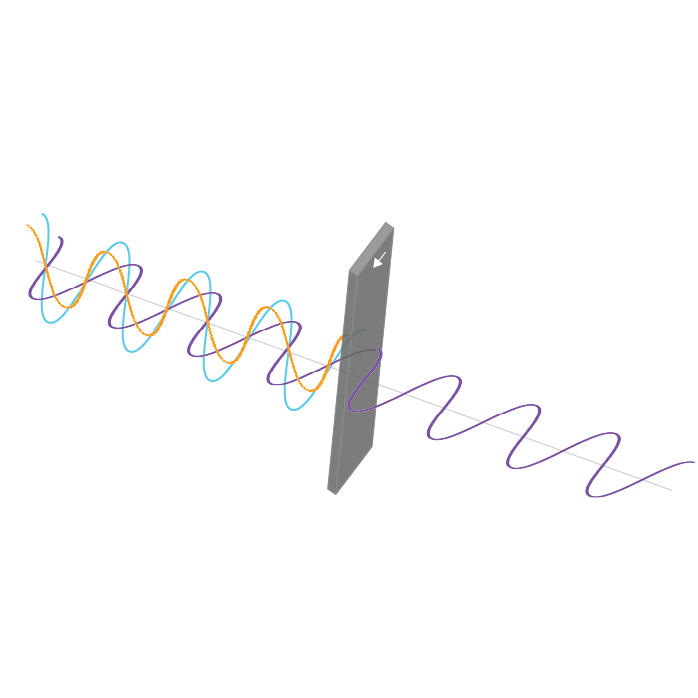
Magic Stripes
- Establishing a foundation for this video, students are reminded that light is a wave.
- Using a slinky, polarizations are demonstrated as different orientations of oscillations.
- Polarizers are then presented as letting light pass through that is polarized in a specific direction.
- Using an overhead projector, 2 polarizers are layered at perpendicular orientations.
- Inserting different plastic items in between, stress birefringence is demonstrated.
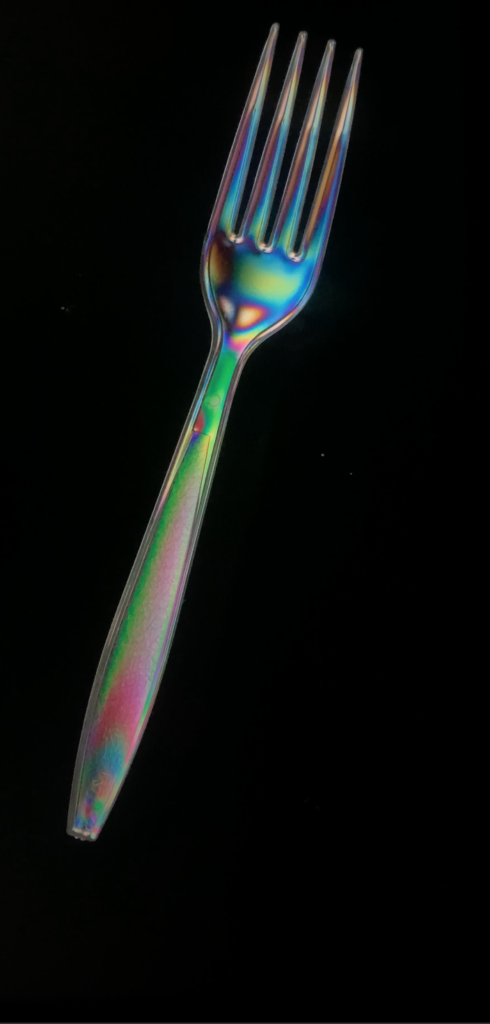
Stress birefringence in a plastic fork.
- Bringing the discussion back to applications, it is mentioned that polarizers are used in sunglasses and 3D glasses, and even that many displays are polarized.
- The end of this section is followed by a general conclusion for the series, as well as by acknowledgements of those who made the successful completion of this project possible.
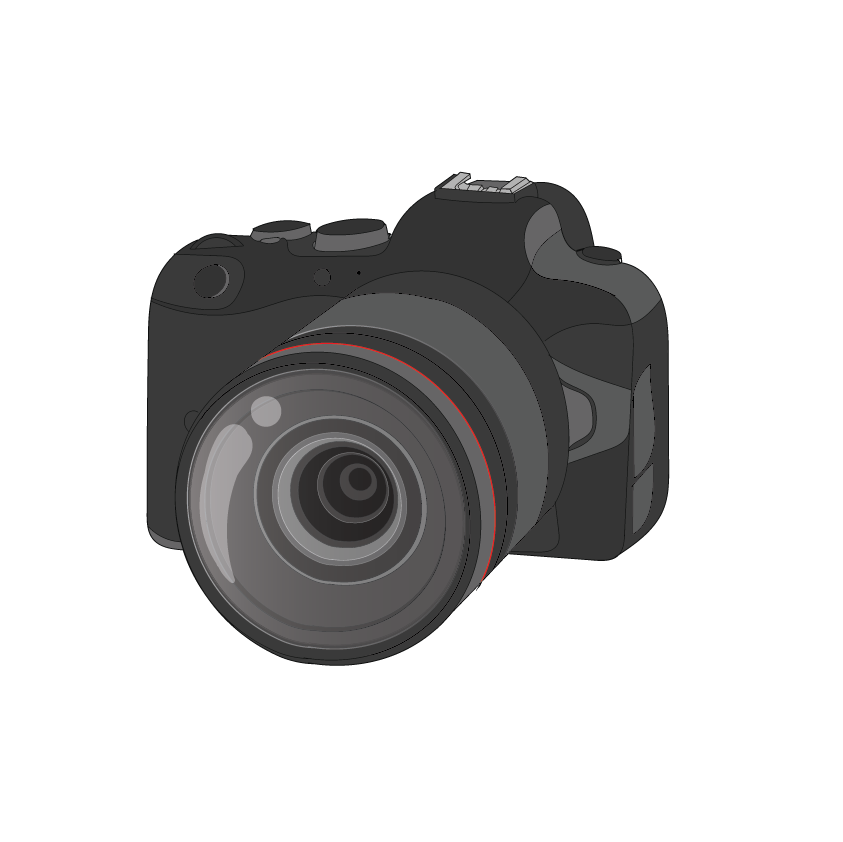
Visuals
We have also created custom graphics and animations to accompany our explanations and create a cohesive video series. All visuals were created in Adobe Illustrator. A sampling are shown here:


Audience and Testing
Our videos are designed to target middle school students, and to this end, 5 of the 10 videos have been shown to students at Gates-Chili Middle School.
In order to gauge the efficacy of our videos with students, we shared them with students at Gates-Chili Middle School and gathered feedback via questions integrated into the videos through the educational platform Nearpod.com.
Student responses
The following pie charts reflect the responses from 20 8th grade students at Gates-Chili Middle School.
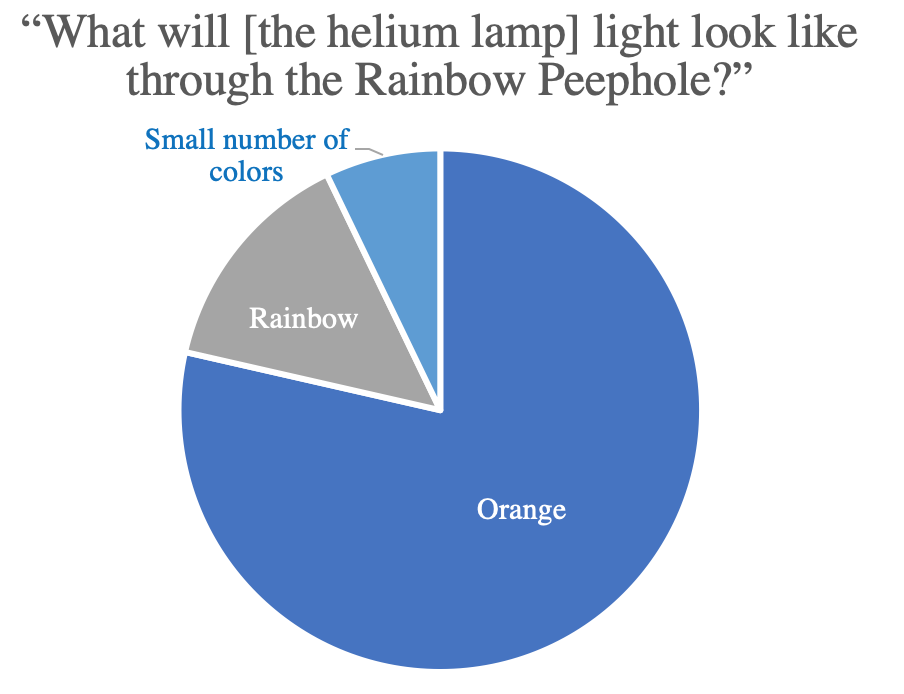
Questions such as this one were posed prior to the completion of the demonstration and showed that their intuition didn’t match the actual outcome (in this case that the light from a helium lamp is composed of discrete wavelengths), confirming that this was new and surprising material for them.
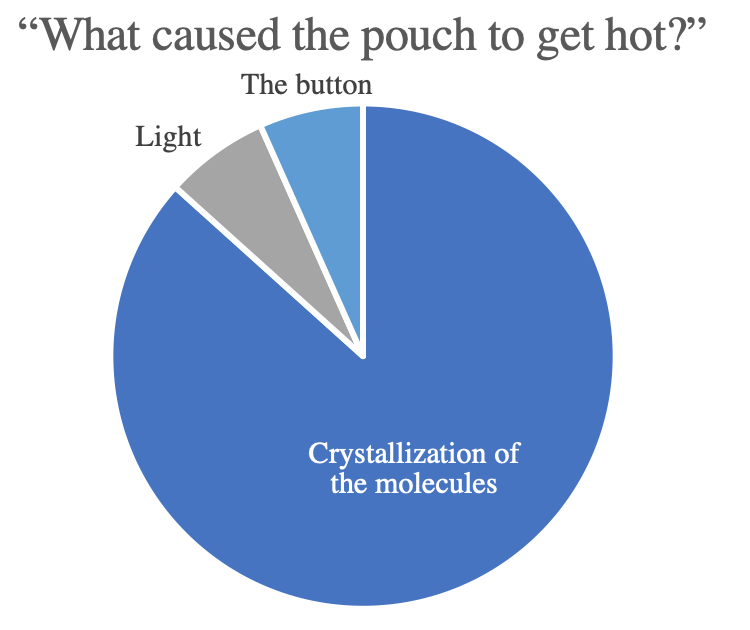
Other questions were asked after the completion of the video and showed that students remembered some of the big take-aways. While only a third of the students even knew the red pouch was a heating pad at the start, the majority demonstrated that they understood that the heat was the result of a reaction where the molecules are crystalized. This increased confidence that students were interested in, and learned from, these videos.
“I liked how they explained each process and gave me a better understanding of some things I have never even thought about.”
— Anonymous Student, 8th Grade
“I thought it was really cool how many things you can do with light!”
— Anonymous Student, 8th Grade
Positive responses like these have increased our confidence in the success of this project, but we also received constructive feedback to improve those videos — including re-filming one of them — and that guided the completion of the other five as well.